classMyParentRecord < ActiveRecord::BaseincludeActiveRecord::ValidateUniqueChildAttributehas_many:childrenaccepts_nested_attributes_for:children# Add an error to the MyParentRecord object whenever two or# more children have the same value of some_attributevalidates_uniqueness_of_child_attribute:children,:some_attributeend
But wait, Rails already does this!
Yeah, in theory it does.
However, if you use accepts_nested_attributes_for in your parent class then the validates_uniqueness_of validations in your child class will only be triggered for existing records. This means that nested attributes in a standard controller #create method will only fail at the DB constraint level, which often results in a very ugly error experience for the end user.
This is a long-standing Rails bug that is not expected to be fixed any time soon.
validate: Whether to call valid? on each of the children before looking for duplicate values of some_attribute. This is useful if your before_validation code munges the value of some_attribute by stripping, downcasing, or otherwise normalizing its value.
error_formatter: A method for formatting the error message that is attached to the parent record’s errors[:children] array. A default formatter is provided. Alternatively you can pass a block to the validates_uniqueness_of_child_attribute class method:
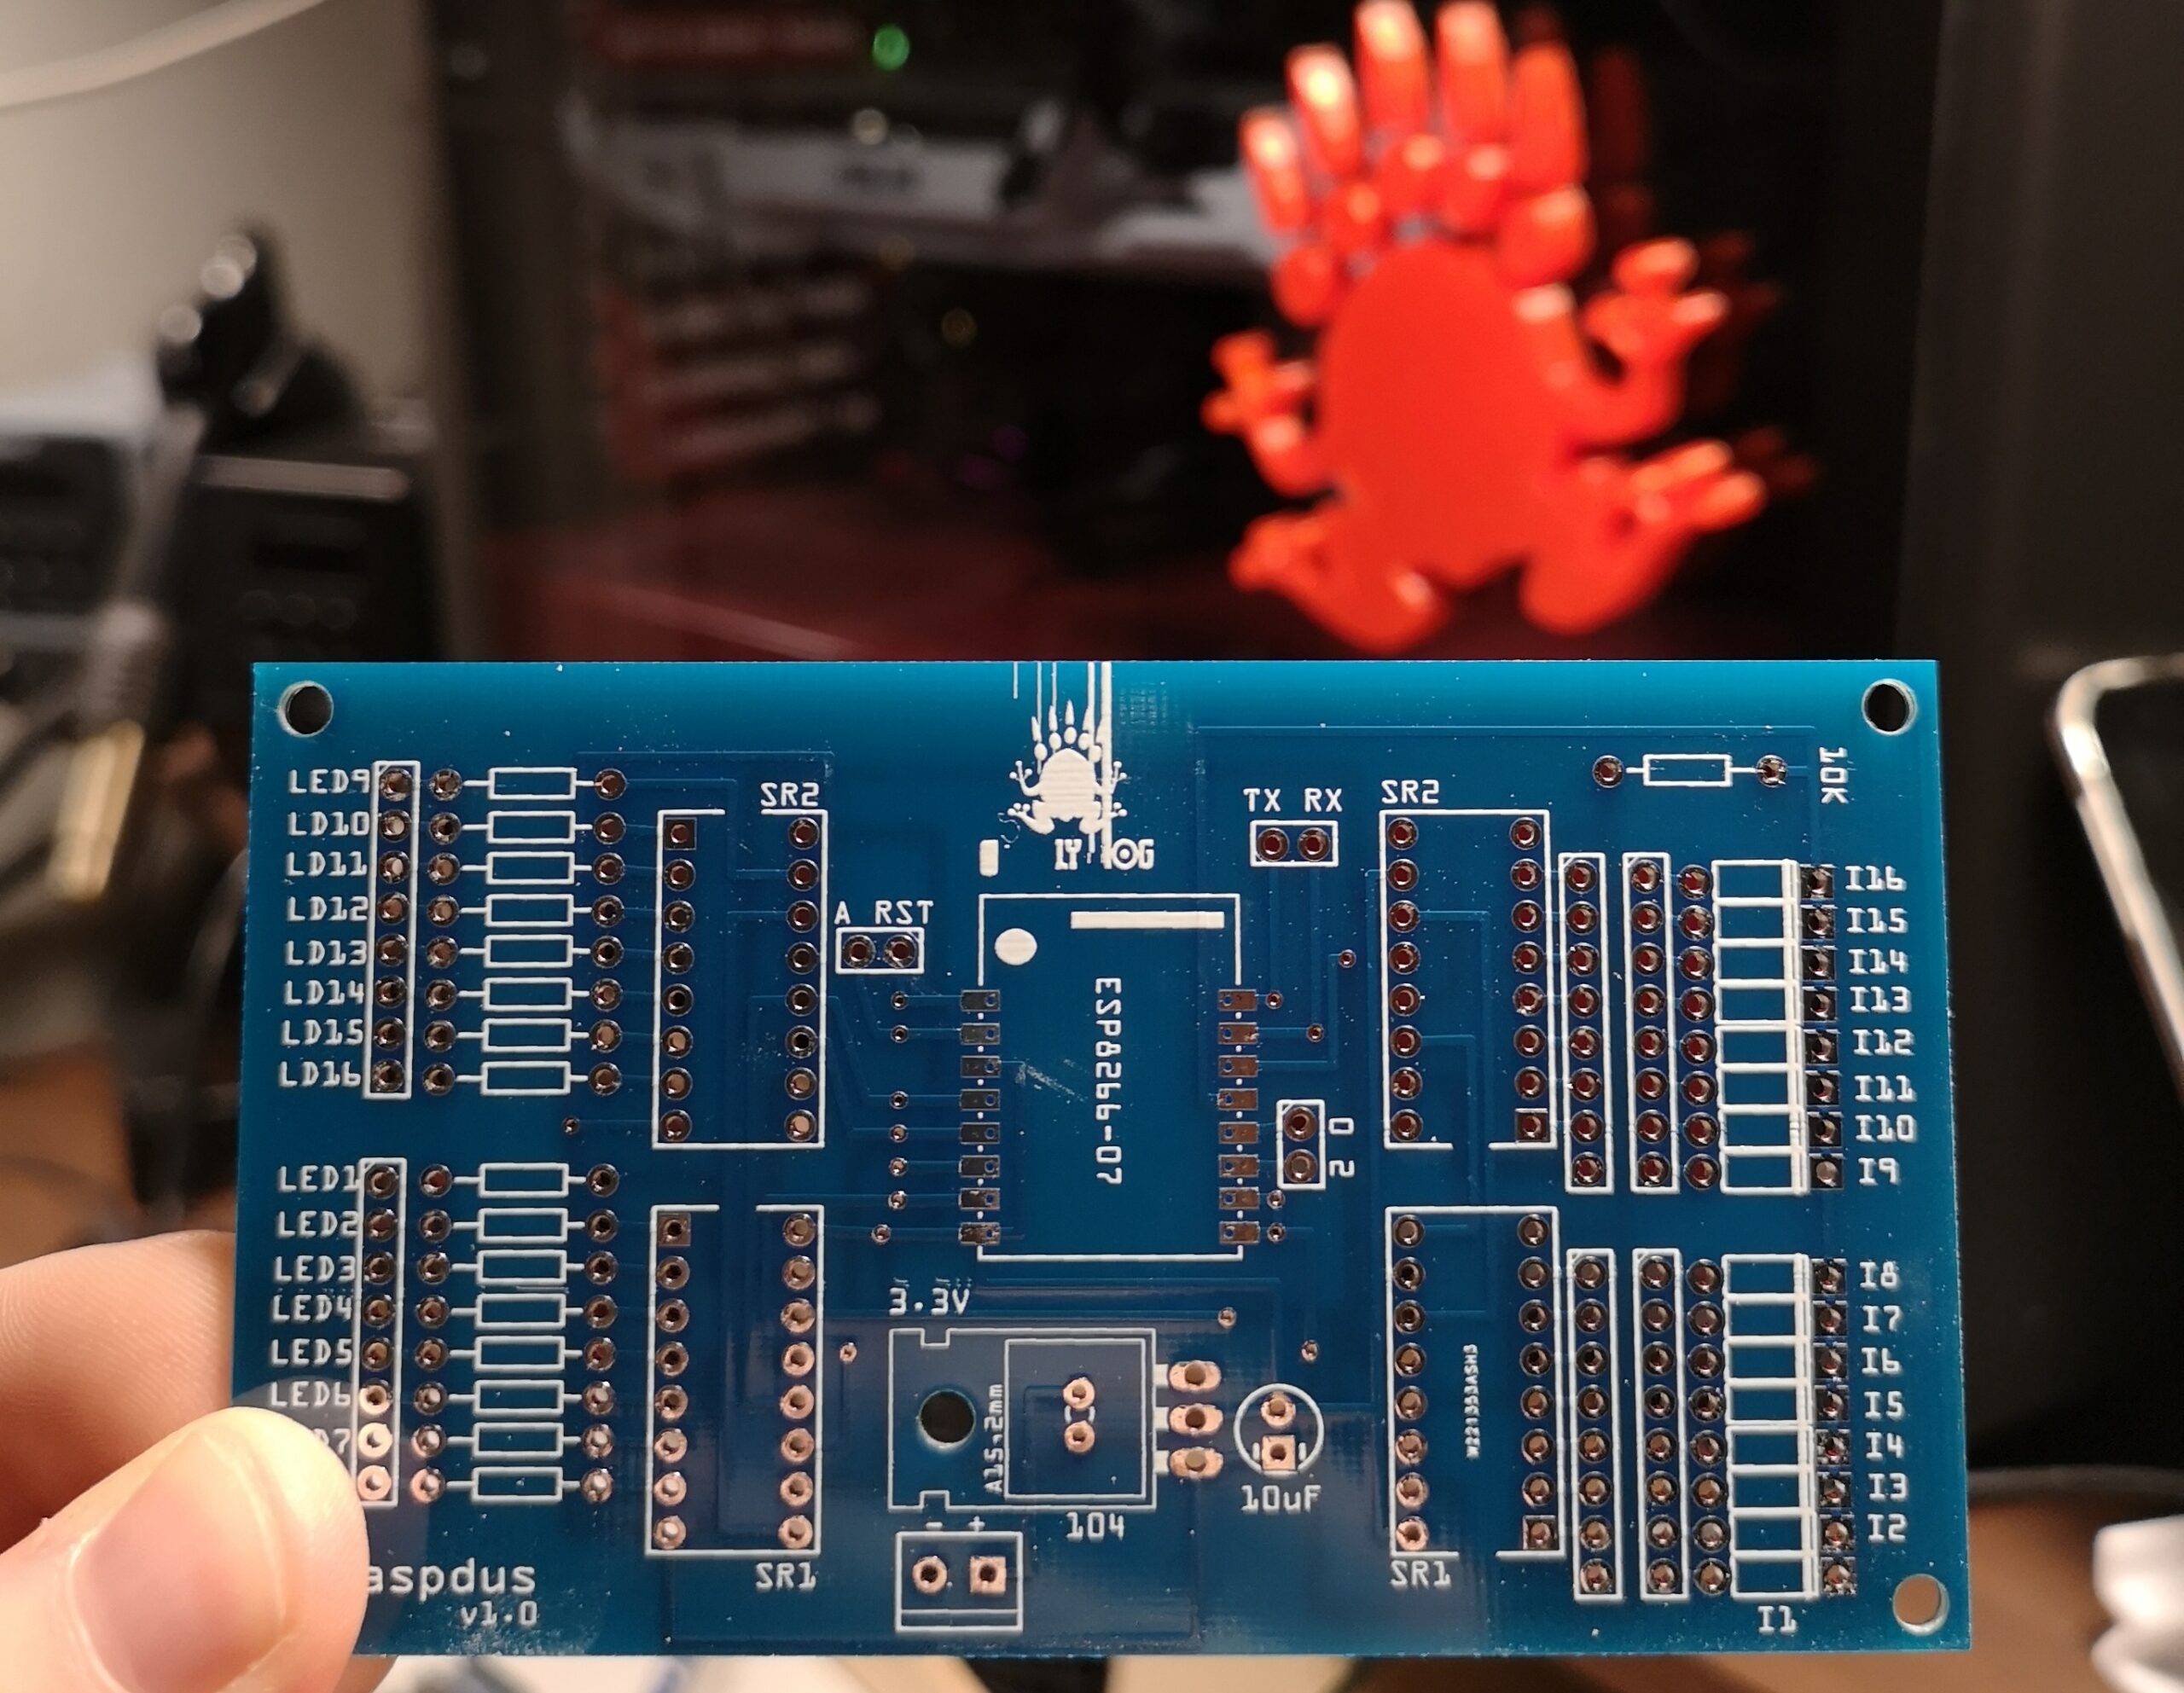
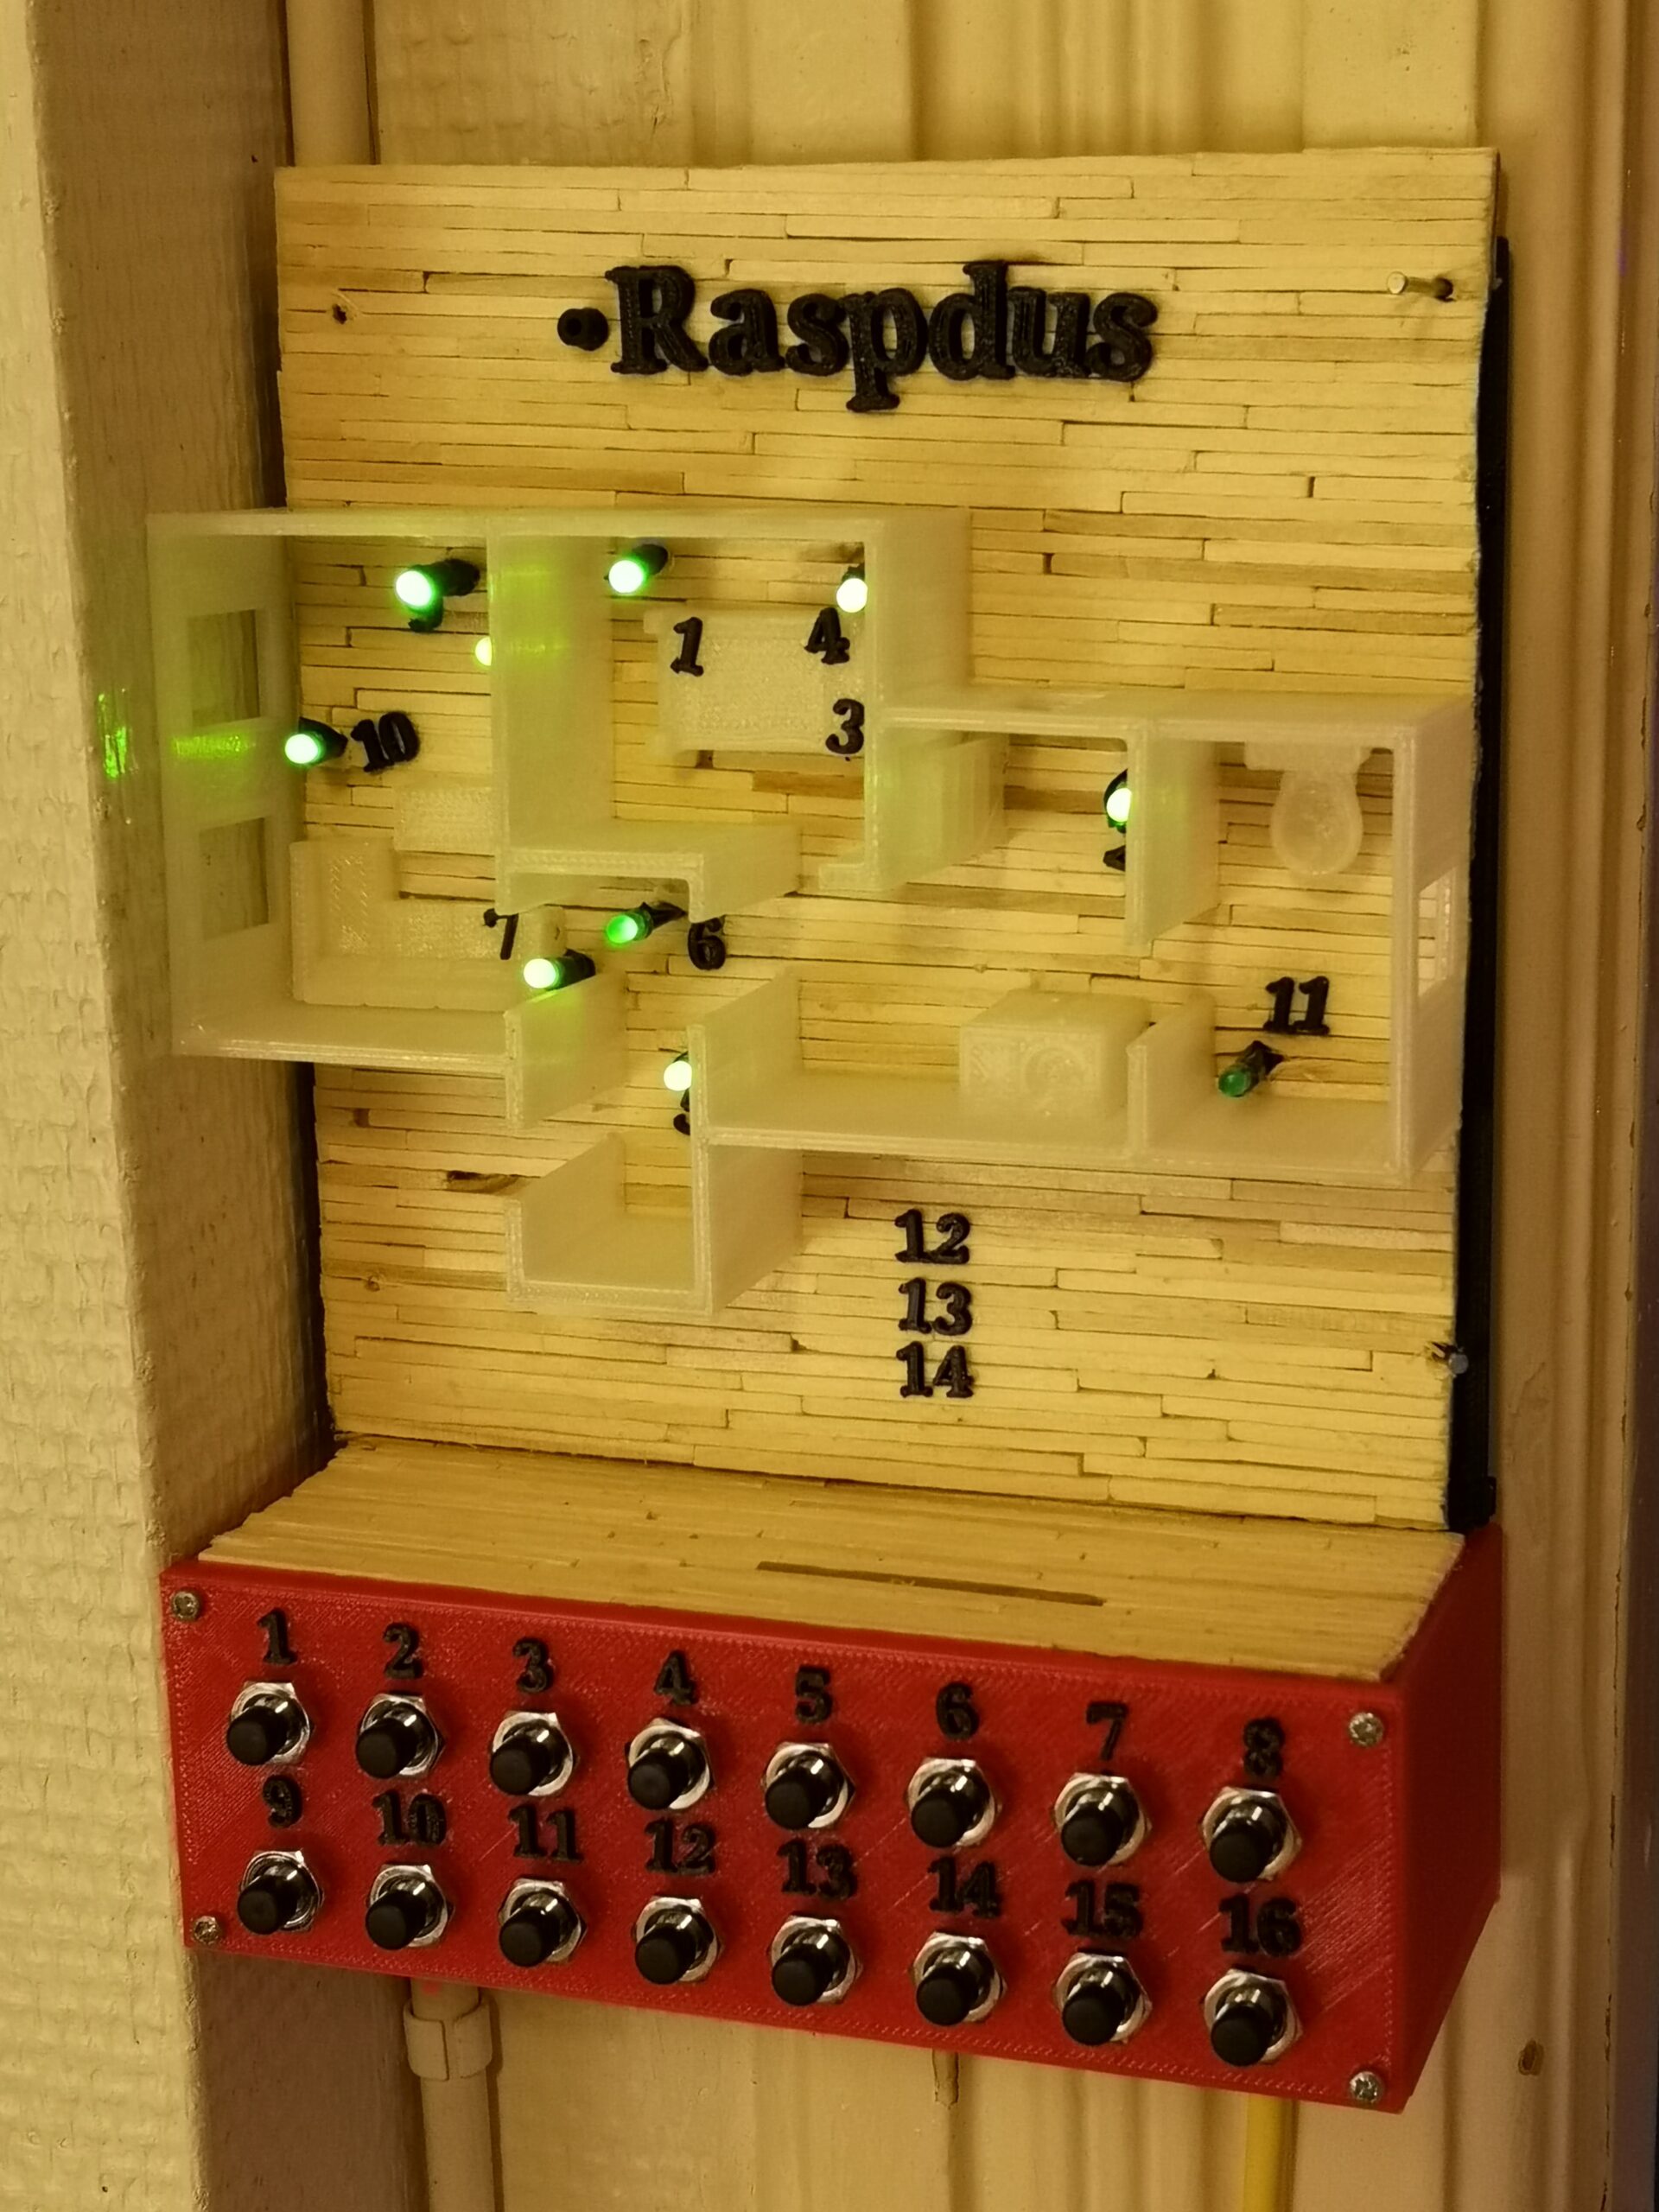
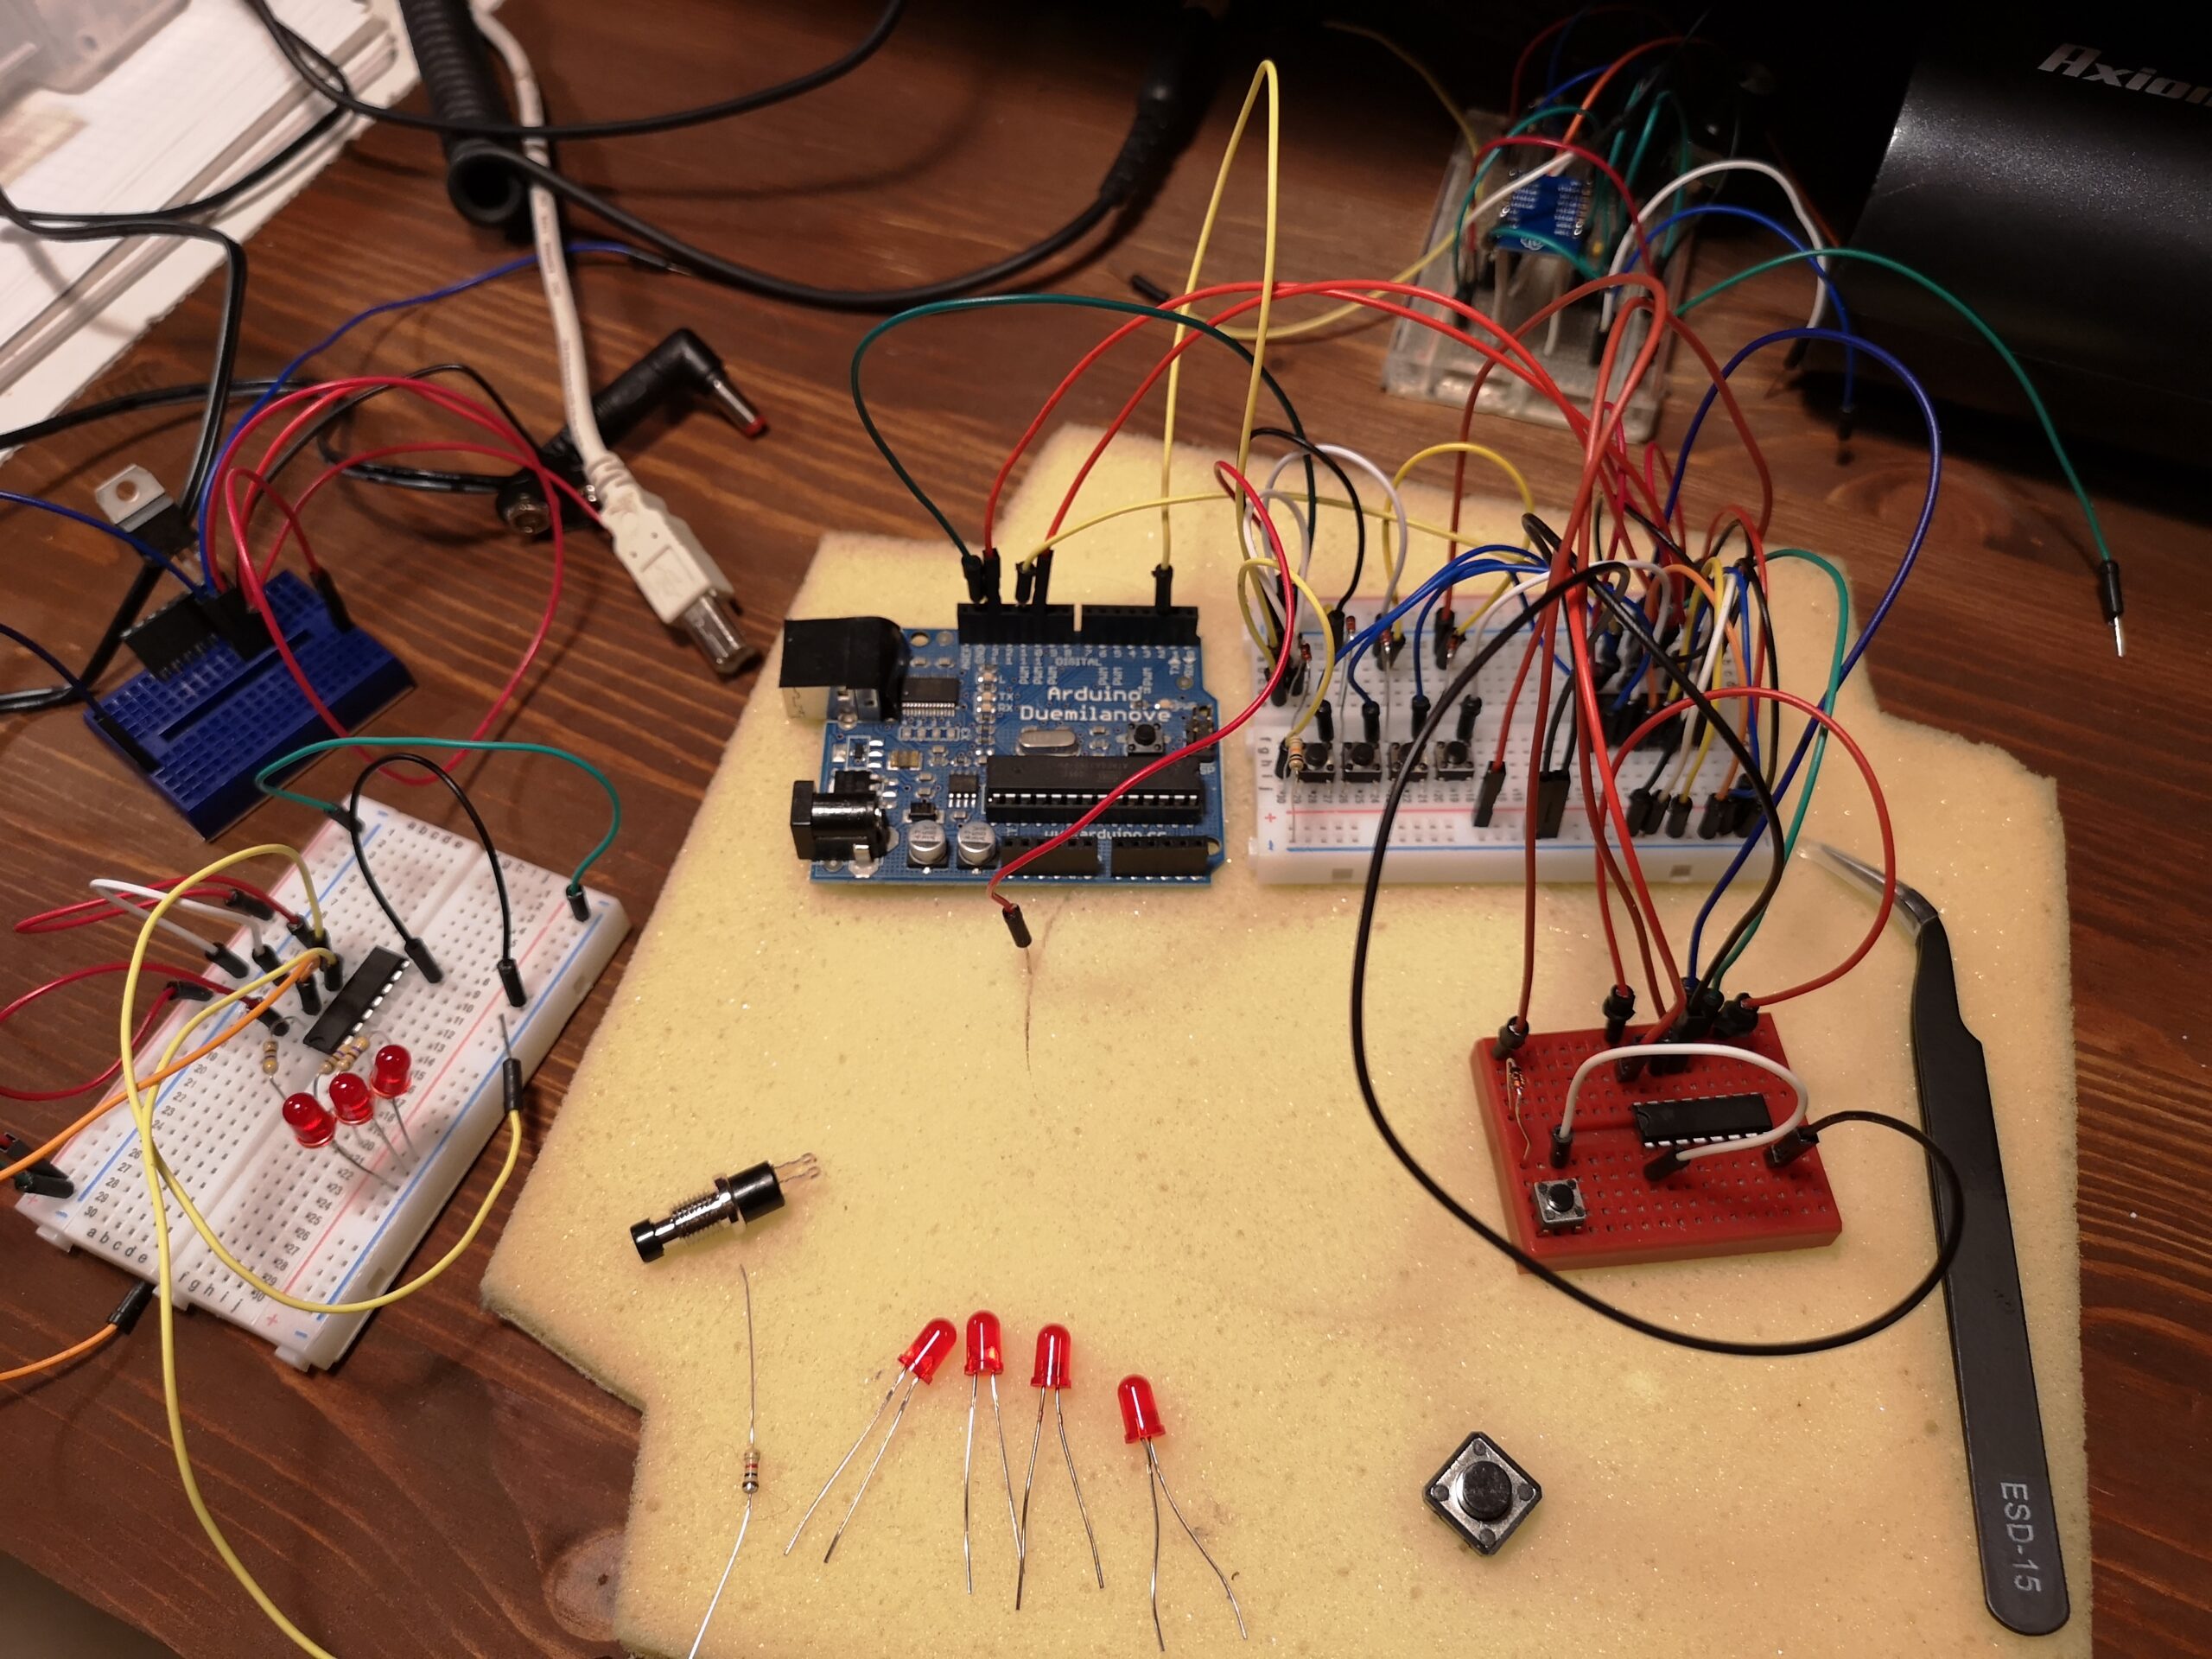
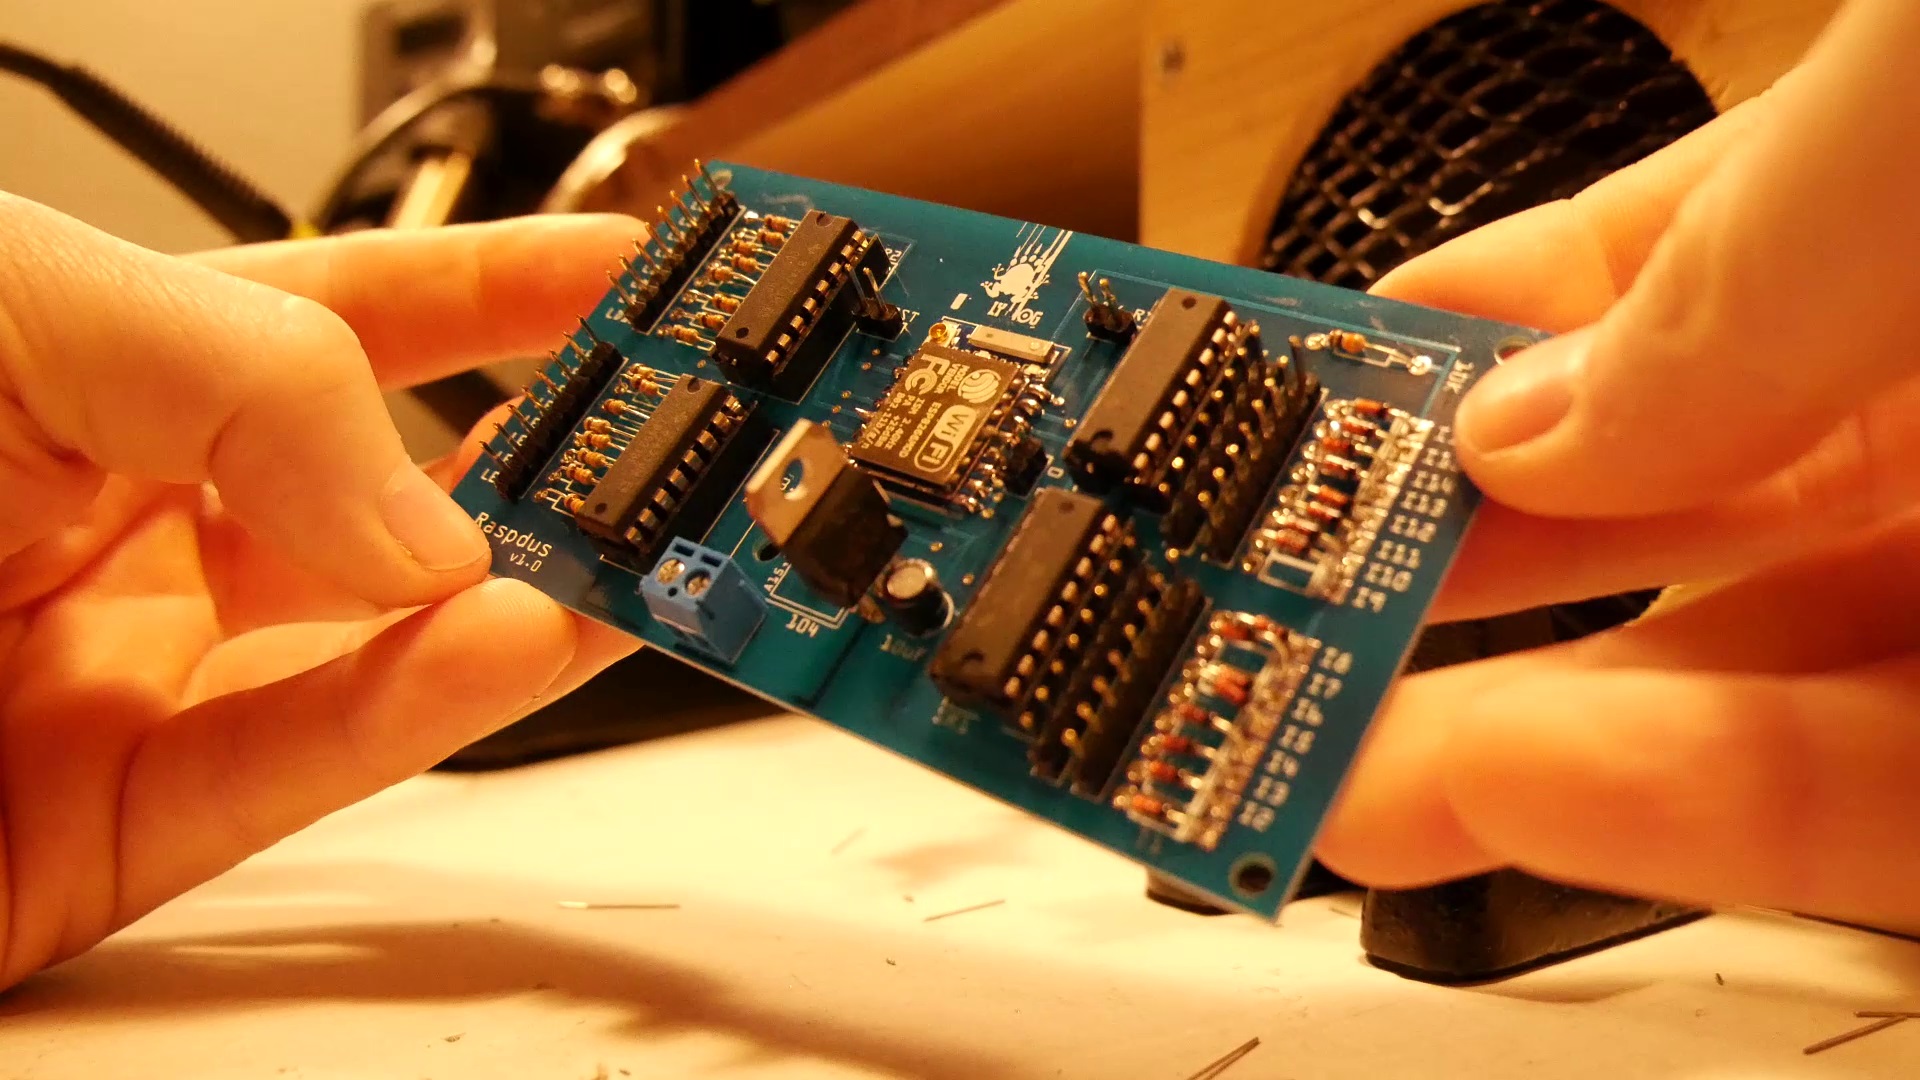
WebSocket Using Websocket data to control LED status
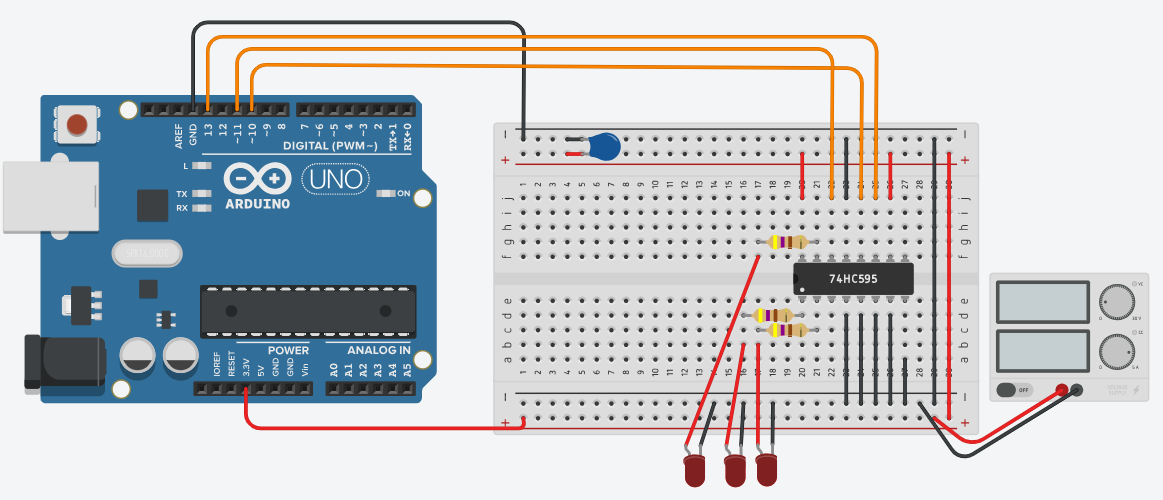
Using a 74HC595 shift registers to drive LED status using data received from Websocket connection.
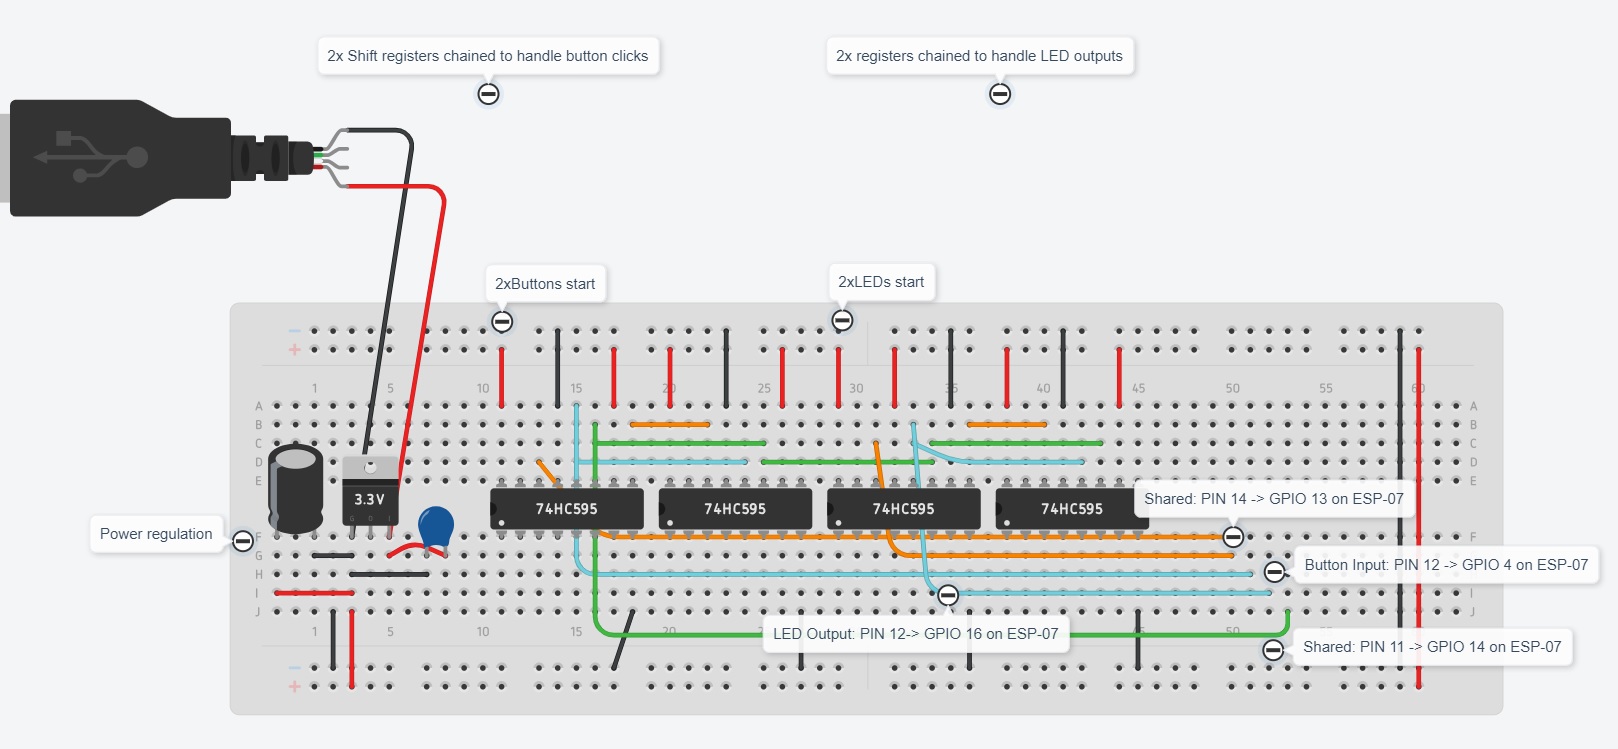
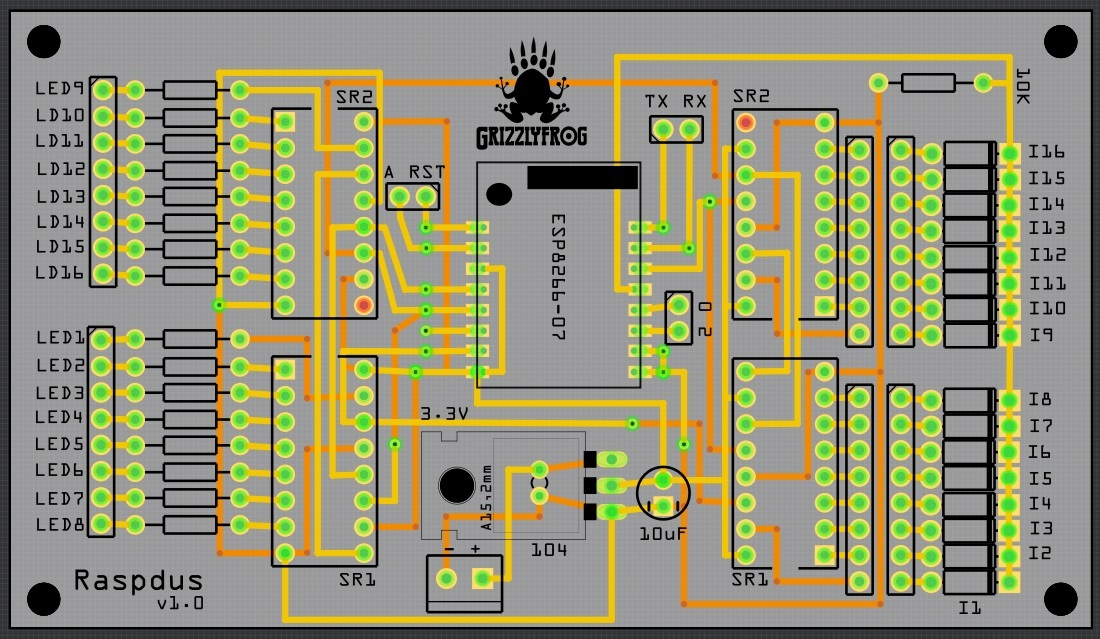
RaspdusWifi ESP8266-07 Wifi chip, will serve as brain in the Raspdus controller project
Basically combines the stuff from the other sketches. This is a remote control that connects to my wifi at home that talks to my home automation API to control the lights!
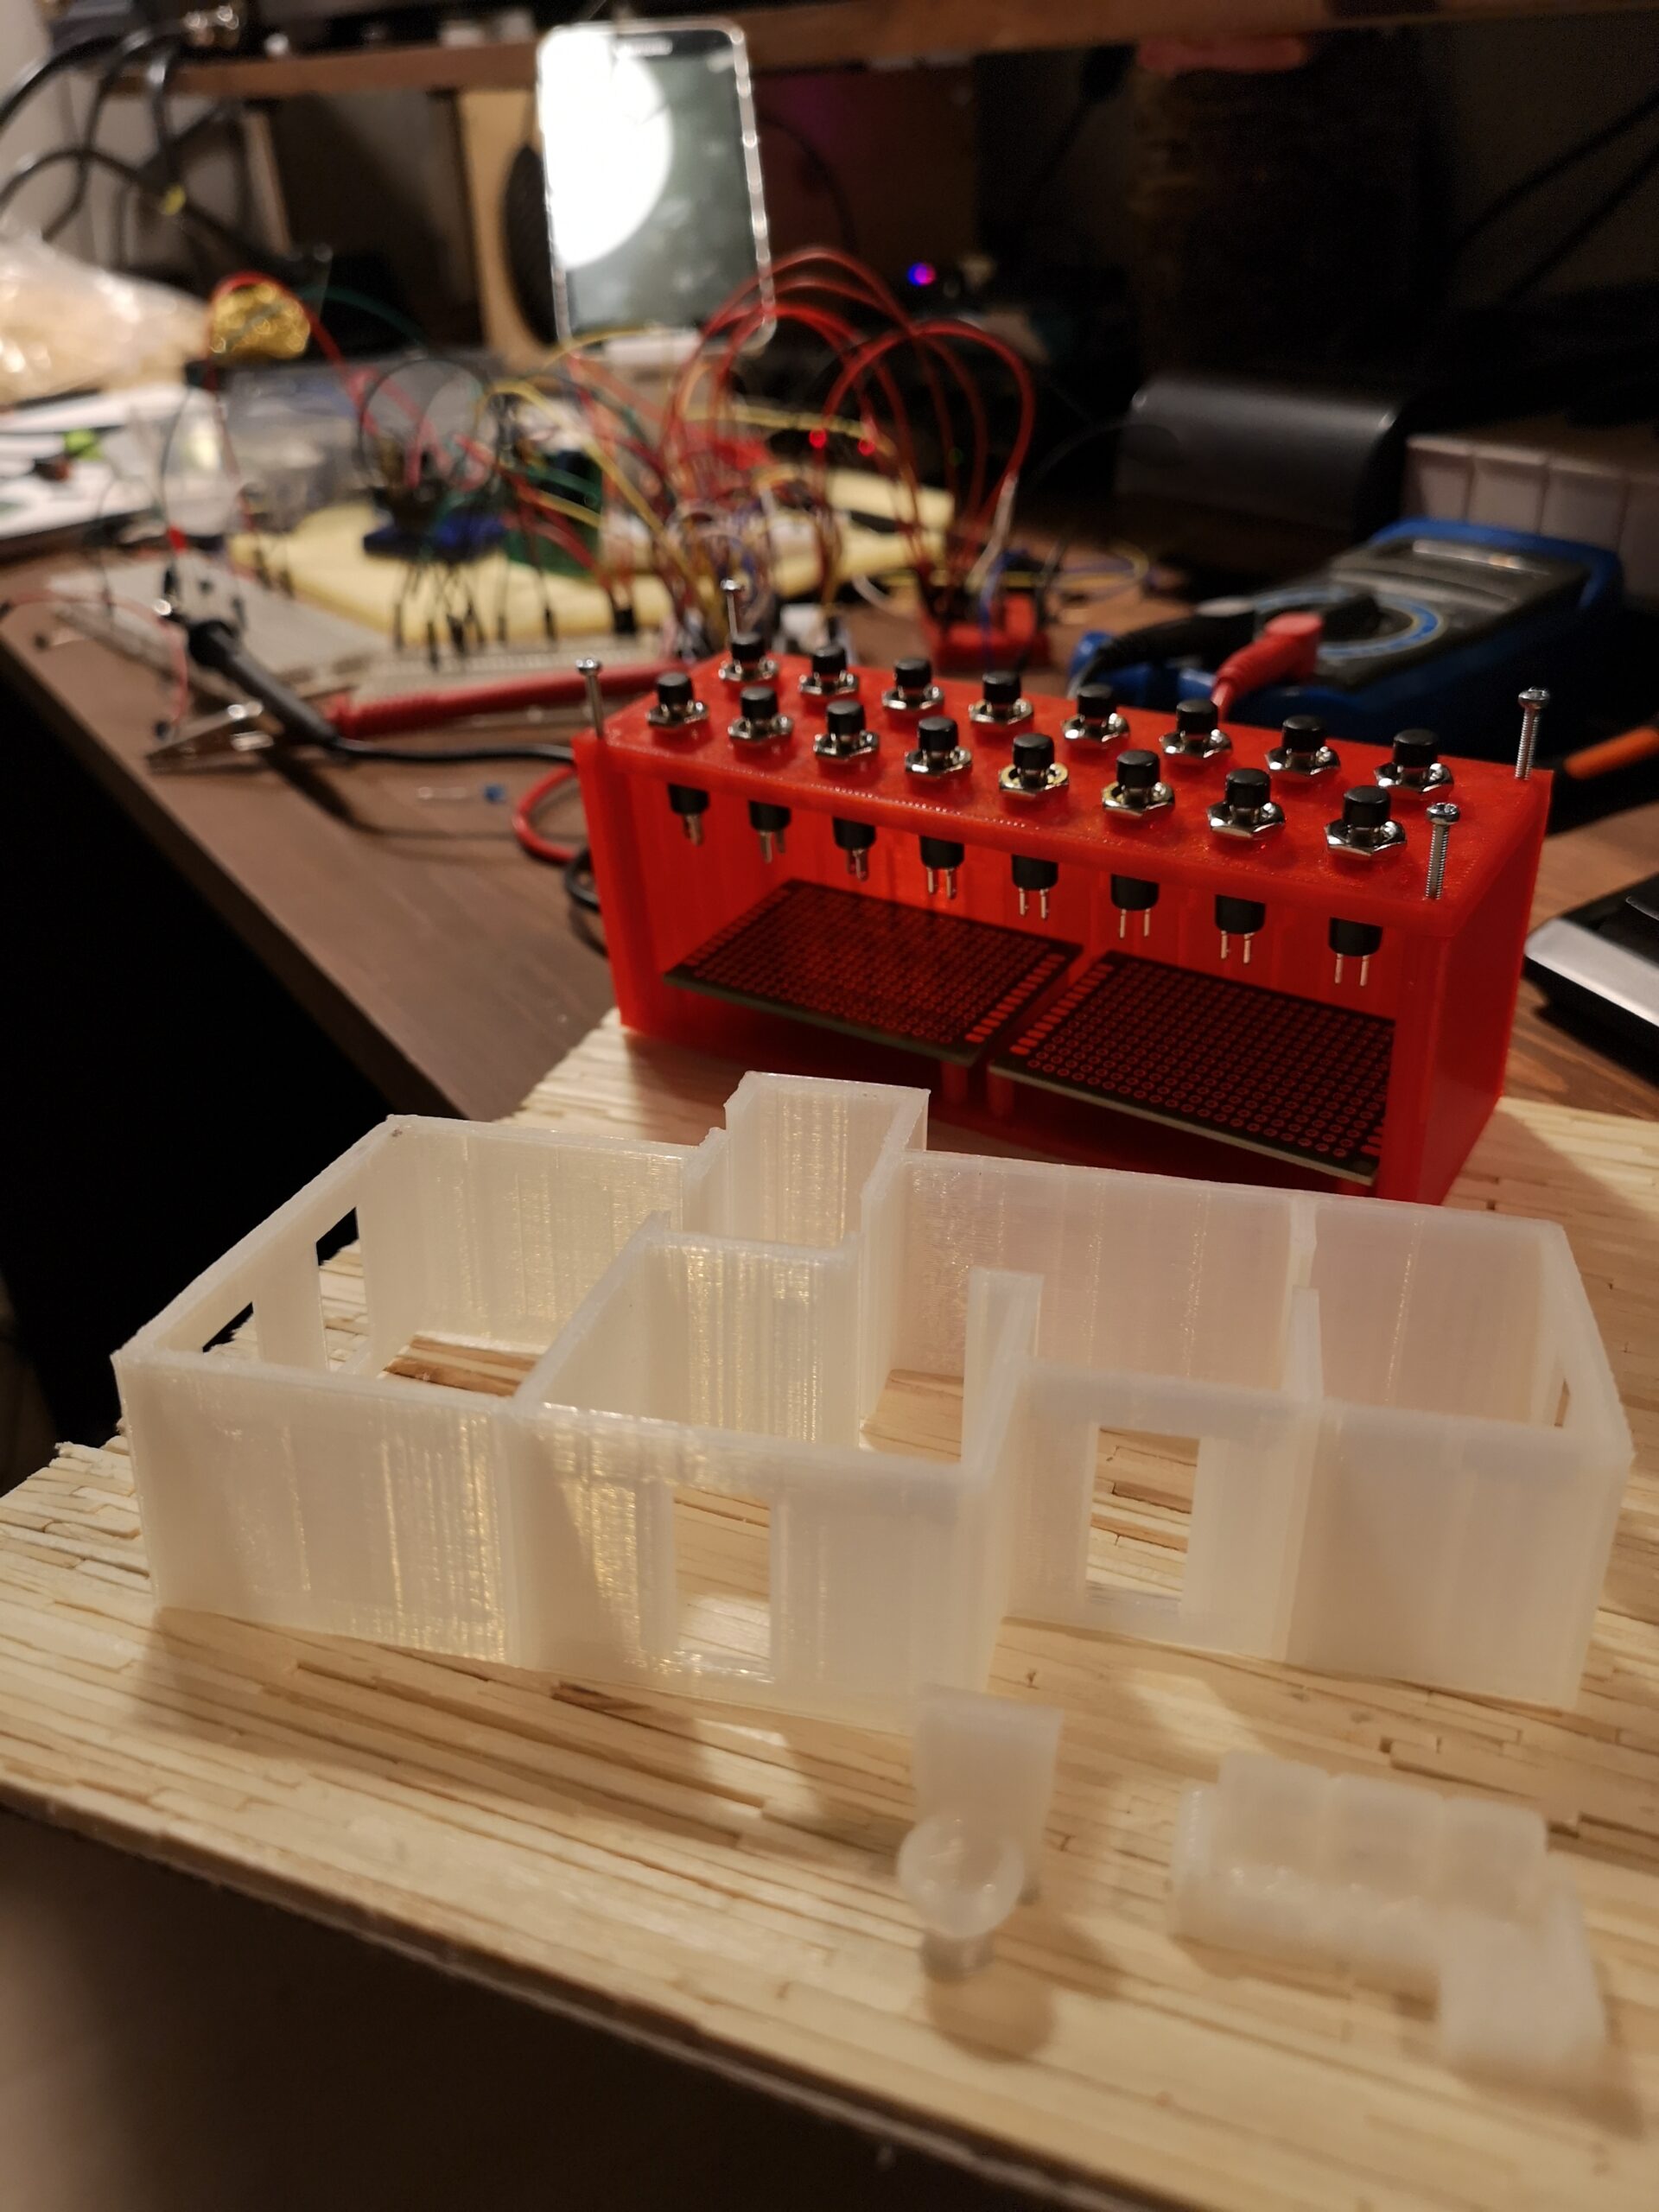
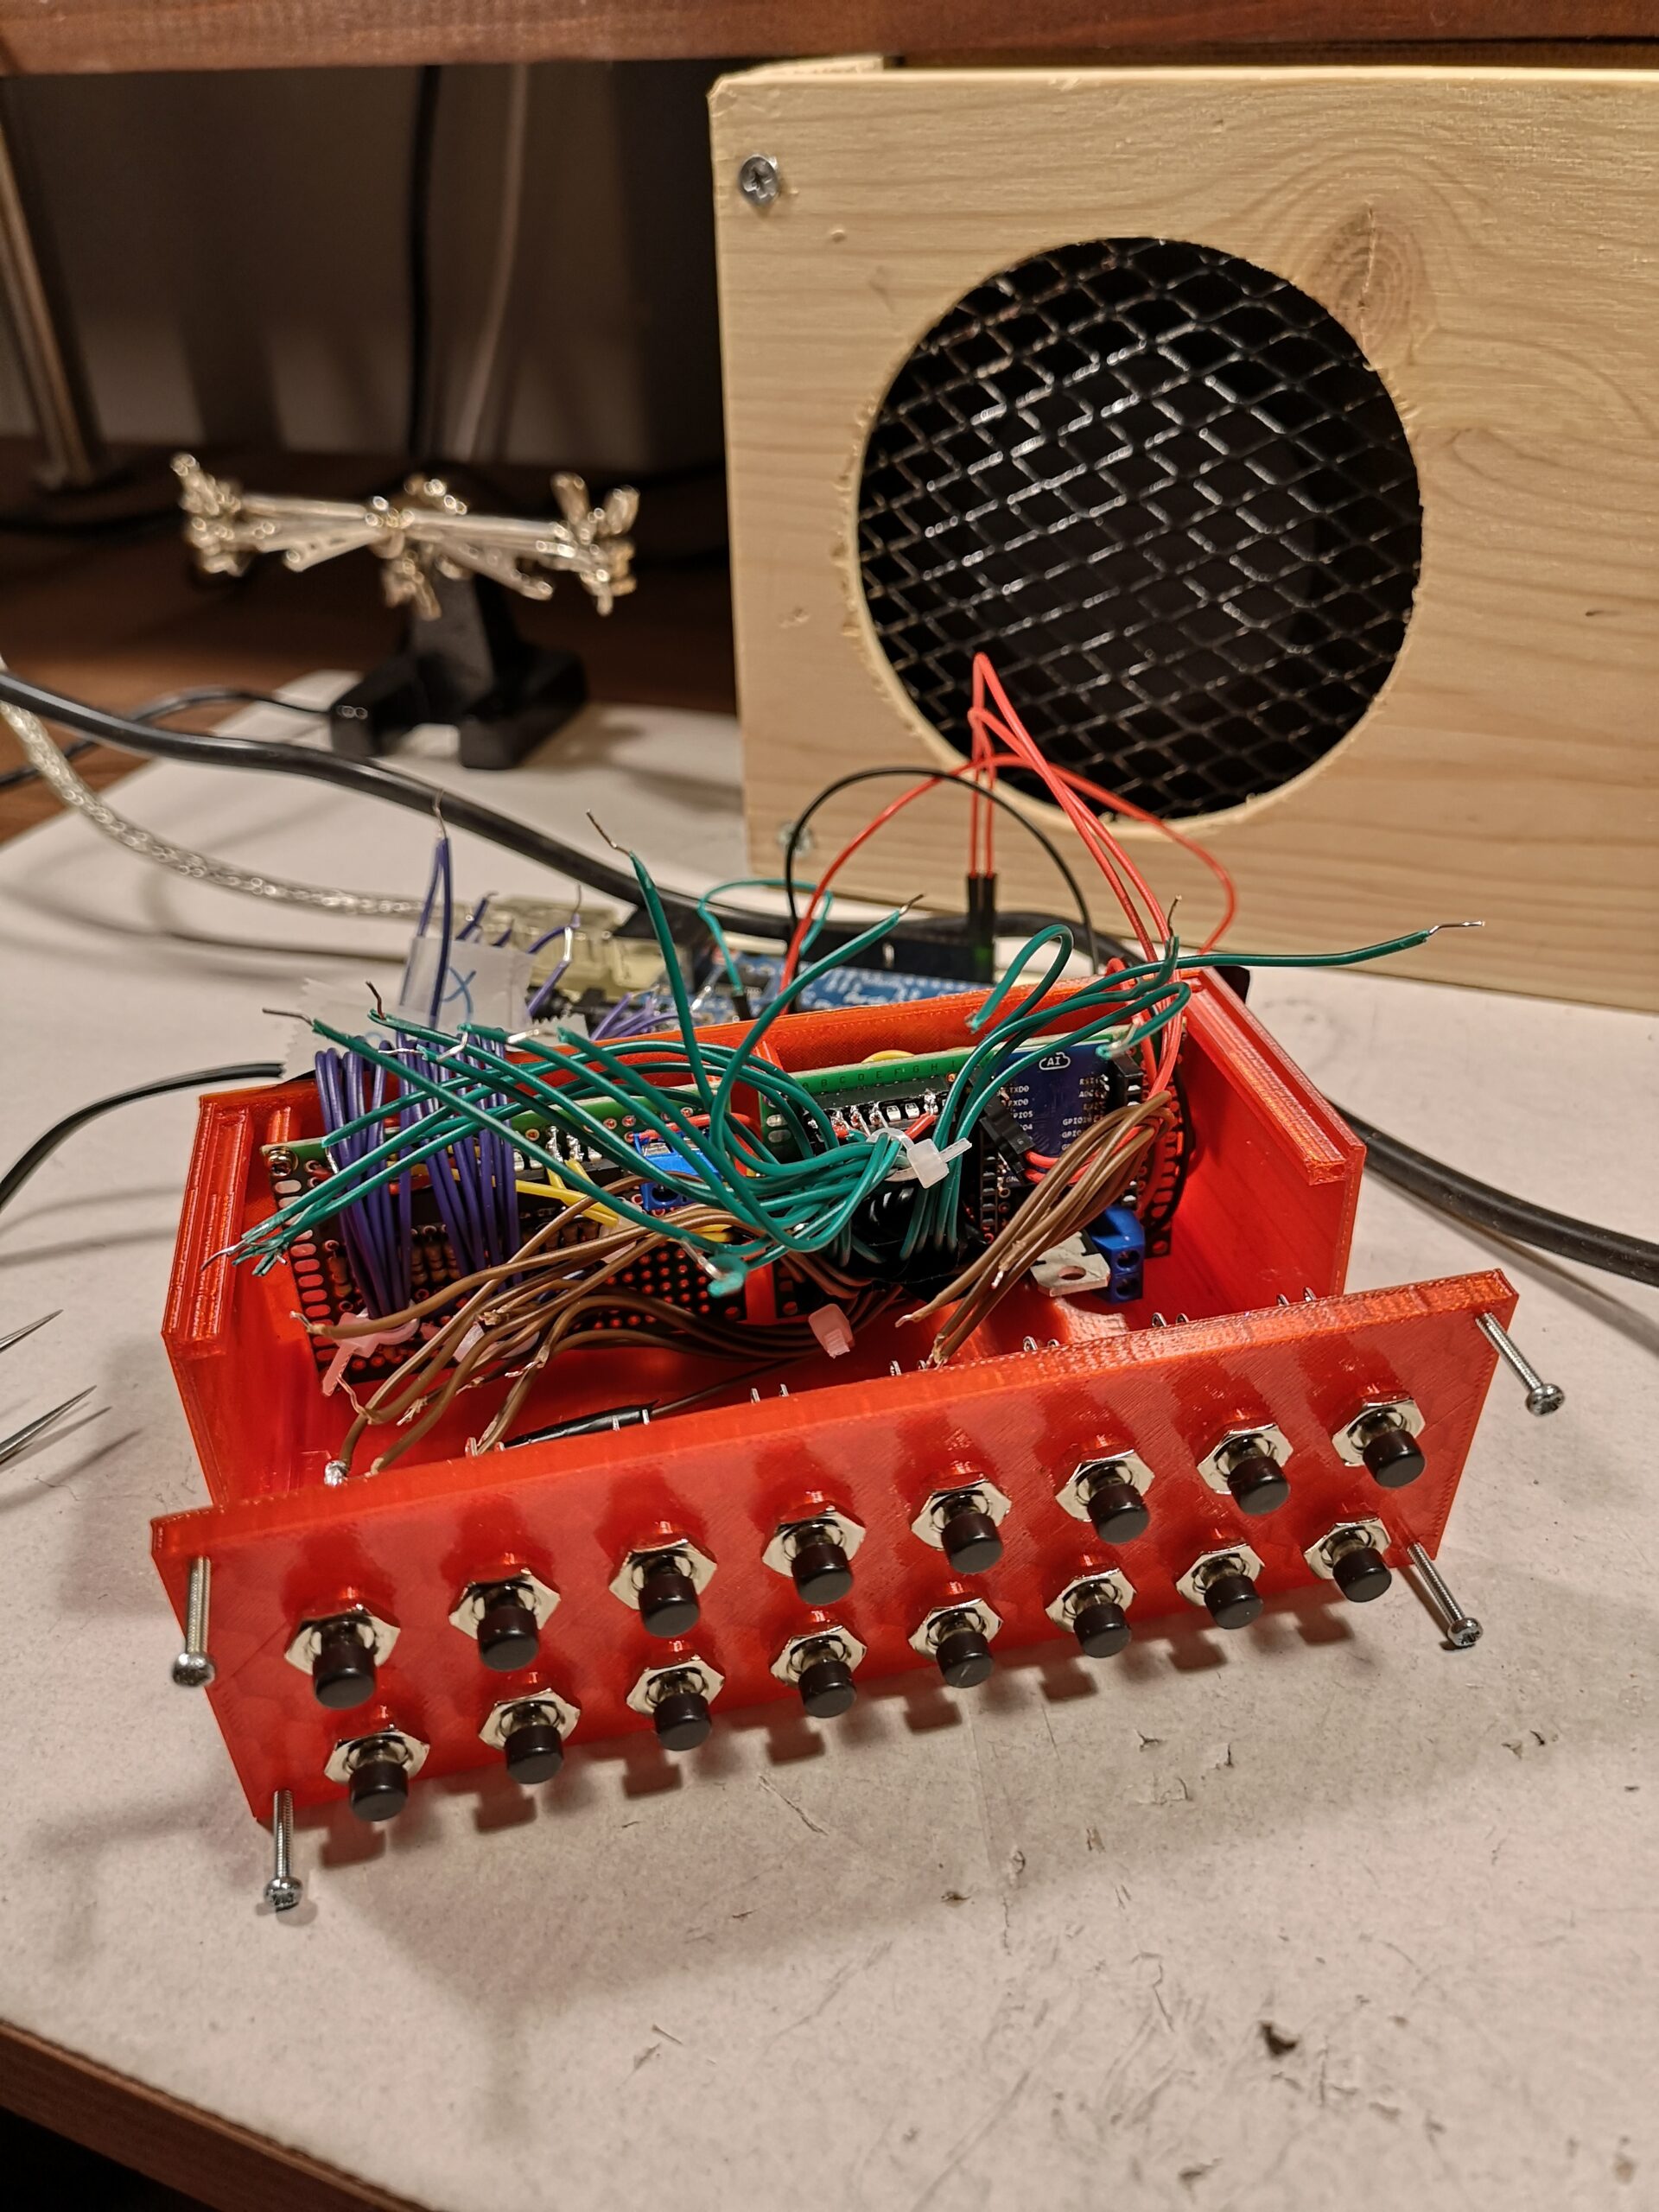
WebSocket Using Websocket data to control LED status
Using a 74HC595 shift registers to drive LED status using data received from Websocket connection.
RaspdusWifi ESP8266-07 Wifi chip, will serve as brain in the Raspdus controller project
Basically combines the stuff from the other sketches. This is a remote control that connects to my wifi at home that talks to my home automation API to control the lights!
Super strong python3 encryption program with file and folder support
Due to the encryption algorithm in use here, large files should not be encrypted with this tool. Robocrypt keeps data in memory while encrypting/decrypting, so depending on the RAM in your system there will be a limit on the size of files you can handle with this tool.
Robocrypt is amazing for encrypting small files and folders with sensitive data. It uses symmetric key encryption, plus a salt of random bytes. I guarantee that ain’t nobody gonna break the encryption, unless you use a sub-par password.
If you’re using Windows, do the same thing but in C:\secure.
Generate a salt to use when encrypting stuff:
$ robocrypt generate-salt 69173
Make sure that you decrypt anything you’ve encrypted with your current salt(or back it up) before you change it! Otherwise you will never be able to recover files that you encrypted.
If you intend to share encrypted files with someone, you also need to share your salt with them, or they will have serious trouble trying to decrypt the files.
Encrypts a bytes message using the specified bytes password.
Args message : bytes
: the message to encrypt
password : bytes
: the password to encrypt the message with
Returns bytes
: the encrypted bytes
Function encrypt_file
def encrypt_file(
    filepath: str,
    password: str
)
Encrypts a file and saves it with a .robo for file or .robodir extension for directories. I strongly advise that you not mess with the extensions if you want to be able to properly decrypt your files.
Args filepath : str
: The file or directory to encrypt
password : str
: the password to encrypt the file with
Function generate_salt
def generate_salt(
    length: int
)
Generates a salt and stores it in the file indicated by the ENV var ROBO_SALT_FILE.
Args length : int
: the number of bytes to contain in the salt
Returns str
: the location of the new salt file
Function get_kdf
def get_kdf()
Gets a KDF object to perform cryptography with.
Returns PBKDF2HMAC
: the KDF to perform encryption/decryption with
Function get_salt
def get_salt(
    salt_file: str = None
) ‑> bytes
Gets the salt bytes used to encrypt and decrypt things.
If a salt file is not specified and the env var ROBO_SALT_FILE is not set, a default salt location for your OS will be used. If there is not a salt at that location, robocrypt will raise an error.
The salt file location is stored in the environment variable ROBO_SALT_FILE. You can modify this environment variable to point to different salt files if desired.
Args salt_file : str
: a custom file to read the salt from.
Returns str
: the salt bytes
Function get_salt_file
def get_salt_file() ‑> str
Returns the location of the salt file used for cryptography.
On Unix systems the salt file is at /var/secure/robocrypt.salt, and on Windows the salt is at C:/secure/robocrypt.salt. If a custom salt is specified in the environment variable ROBO_SALT_FILE, it will be used instead of the OS default.
Returns the decrypted content of an encrypted file without decrypting the file itself.
Args filepath : str
: the encrypted file to read
password : str
: the password to use to read the file
Returns bytes
: the file’s decrypted content in bytes
Classes
Class DecryptionError
class DecryptionError
This occurs when an invalid password is used to try to decrypt something, or the wrong salt is used.
Generated by pdoc 0.10.0 (https://pdoc3.github.io). That’s why the documentation looks like crap.
Robocrypt Command Line:
Here is the help for the robocrypt CLI:
usage: robocrypt [-h] [-s SALT_FILE] [-v] {generate-salt,gs,encrypt,en,decrypt,de} ... ____ __ __ __ / __ \____ / /_ ____ / // / / /_/ / __ \/ __ \/ __ \ / // /_ / _, _/ /_/ / /_/ / /_/ / /__ __/ /_/ |_|\____/_.___/\____/ /_/ positional arguments: {generate-salt,gs,encrypt,en,decrypt,de} generate-salt (gs) generate and save a new random salt of a given length encrypt (en) encrypt a file or directory decrypt (de) decrypt a file or directoryoptional arguments: -h, --help show this help message and exit -s SALT_FILE, --salt-file SALT_FILE specify a salt file to use -v, --version show program's version number and exit
The commands you can use are these:
generate-salt or shortcut gs
encrypt or shortcut en
decrypt or shortcut de
To specify a salt file to generate, encrypt, or decrypt, use the argument --salt-file /path/to/saltfile.
generate-salt:
Generate a salt in the default location:
$ sudo robocrypt generate-salt 5829Overwriting your old salt will render anything encrypted with it absolutely un-readable, unless you back it up.Are you sure you want to do this? yesSuccessfully saved a salt of length 5829 to /var/secure/robocrypt.salt
Robocrypt will ask you if you really want to overwrite any existing salt files. Answering no at the prompt will exit the program without touching the salt.
Generate a salt to a specific file:
$ sudo robocrypt --salt-file /var/secure/myother.salt generate-salt 5829Successfully saved a salt of length 5829 to /var/secure/myother.salt
Here we were not prompted to confirm because there was no previous file at /var/secure/myother.salt.
encrypt:
Encrypt a file:
$ robocrypt encrypt tests/data/Dictionary.java
Enter password to encrypt: 🔑
Successfully encrypted /path/tests/data/Dictionary.java!
$ ls tests/data/
Dictionary.java.robo  src
You can see that Dictionary.java was encrypted and saved as Dictionary.java.robo.
Encrypt a folder with a specified salt:
$ robocrypt --salt-file /var/secure/alternate.salt encrypt tests/data/src/Enter password to encrypt: 🔑Successfully encrypted /path/tests/data/src!
$ ls tests/data/Dictionary.java.robo src.robodir
The src directory was encrypted and saved as src.robodir using the alternate.salt.
decrypt:
Decrypt a file:
$ robocrypt decrypt tests/data/Dictionary.java.robo Enter password to decrypt: 🔑Successfully decrypted /path/tests/data/Dictionary.java.robo!
$ ls tests/data/Dictionary.java src.robodir
Dictionary.java was restored to its original state with only the .java extension.
Decrypt a folder with a specified salt:
$ robocrypt --salt-file /var/secure/alternate.salt decrypt tests/data/src.robodirEnter password to decrypt: 🔑Successfully decrypted /path/tests/data/src.robodir!
$ ls tests/data/Dictionary.java src
Now the src directory is back to normal, with no .robodir extension.
Warning!
When using the tool, don’t jack around with the output files’ extensions (.robo and .robodir). Robocrypt uses these extensions to tell what type of file is encrypted and if change them, you will regret it. Also, I would recommend not double-encrypting anything. Because of the way the program works with extensions, you’ll end up screwing yourself. Encrypt your shit one time with a strong password.
This repository contains all files for the printf project from School 42 Málaga cursus. The project consist in duplicate the printf() function, part of the stdio.h library.
This project consists in duplicate the behavior of the C function printf(). It is not necessary to implement the buffer management of the original function. It must handle the following parameters:
char type variables.
string type variables.
int type variables.
unsigned int type variables.
hexadecimal int type variables (uppercase and lowercase).
The main obstacles during the execution of the project have been: handling a variable number of parameters and the function ft_printf() returning an int.
va_list
To deal with the variable number of parameters entered, the macros va_list, va_start, va_arg and va_end have been used. The ft_printf() function calls the ft_fotmat() function when it finds the % sign among the entered parameters, then it checks the next character in the string to call one of the functions that print the different variable types. To use this macro, the libraryt <stdarg.h> is included in the ft_printf.h.
Returning an integer
To handle the integer returned by ft_printf(), a pointer is given in the format printing functions. In this way, the function handles the number of characters printed before continuing with the string sent by parameter. Example:
void	ft_putchar_pf(char c, size_t *counter)
{
	write(1, &c, 1);
	(*counter)++; // increasing the pointer with each character printed
}
Formats
The different types of variables are printed using a function for each of the formats:
ft_putchar_pf() prints char type variables and is called by each of the following functions to print the character strings one by one. Also, it is where the pointer returned by the ft_printf() function is incremented.
ft_puthex_pf() prints hexadecimal integers, using a string included in the ft_printf.h library. There is one string for uppercase and one for lowercase characters.
ft_putnbr_pf() recursively prints an integer, handling the maximum negative value with a conditional (if-else) and casting the integer to characters.
ft_putptr_pf() prints a pointer, in hexadecimal format (lowercase), preceded by the string “0x”.
ft_putstr_pf() prints a char * type variable, calling ft_putchar_pf() in a while loop. It the string is NULL, it returns "(null)".
ft_aux_pf.c() this file contains all the auxiliary functions, specifically the ft_atoi_base function, made during the August pool. This function will be used mainly to change the base in functions that handle hexadecimal numbers and unsigned int type variables.
Requirements
The functions are written in C language and need the gcc compiler, with <stdlib.h>, <stdarg.h> and <unistd.h> standard libraries to run.
Instructions
1. Compiling the archives
To compile the proiect, go to its path and run:
For mandatory functions:
$ make
2. Cleaning all binary (.o) and executable files (.a)
To delete all files generated with make, go to the path and run:
$ make fclean
3. Using it in your code
To use this project in your code, simply include this header:
Exploring interactions with LLMs : Practical insights with Spring AI
LLM (Large Language Model) concept is widely used to build chatbots, question-answering systems, and other conversational applications.
In this workshop, we will discover how to interact with a LLM as we craft a conversational agent step-by-step.
Throughout this journey, we will understand the capabilities and limitations of LLMs, and explore prompt engineering techniques to elevate their standard behavior.
For the practical part, we will learn about Spring AI’s chat completion features to interact with LLMs. Spring AI serves as an abstraction layer able to interact with several LLM providers.
For the workshop’s purposes, we will use Ollama, a solution for running LLMs locally.
✨ Quick start
If you don’t want to save your work, you can start the workshop directly in a cloud environment.


 https://github.com/GSA/activerecord-validate_unique_child_attribute