Category: Blog

  • nextjs-netlify-blog-template

    Next.js blogging template for Netlify

    Netlify Status MADE BY Next.js

    Next.js blogging template for Netlify is a boilerplate for building blogs with only Netlify stacks.

    There are some boilerplate or tutorials for the combination of Next.js and Netlify on GitHub. These resources have documentation and good tutorial to get started Next.js and Netlify quickly, but they are too simple to build blogs with standard features like tagging.

    Next.js blogging template for Netlify has already implemented these standard features for building blogs with only using Next.js and Netlify stacks.

    Demo

    Deploy on your environment by clicking here:

    Deploy to Netlify

    Or access the following demo site:

    Next.js blog template for Netlify

    Features

    • Tagging: organizes content by tags
    • Author: displays author names who write a post
    • Pagination: limits the number of posts per page
    • CMS: built with CMS to allow editors modifying content with the quickest way
    • SEO optimized: built-in metadata like JSON-LD
    • Shortcode: extends content writing with React component like WordPress shortcodes

    Dependencies

    Getting started

    To create your blog using the template, open your terminal, cd into the directory you’d like to create the app in, and run the following command:

    npx create-next-app your-blog --example "https://github.com/wutali/nextjs-netlify-blog-template"
    

    After that, set up your project as following the Netlify blog:

    A Step-by-Step Guide: Deploying on Netlify

    Customization

    This template is just a template and a boilerplate in which users can customize anything after the project was cloned and started. The following instructions introduce common customization points like adding new metadata or applying a new design theme.

    Styling pages by a customized theme

    All source codes related to the blog are under components and pages directory. You can modify it freely if you want to apply your design theme. All components use styled-jsx and css-modules to define their styles, but you can choose any styling libraries for designing your theme.

    The directory tree containing the blog source code are described below:

    meta: yaml files defining metadata like authors or tags
    public: images, favicons and other static assets
    src
    ├── assets: other assets using inside of components
    ├── components: pieces of components consisting of pages
    ├── content: mdx files for each post page
    ├── lib: project libraries like data fetching or pagination
    └── pages: page components managing by Next.js
    

    Organizing content by categories

    The category metadata that associates with content have the same relationship with the authors’ one. Then reference these implementations for adding new metadata:

    You understood they have four steps to add the category metadata on your project after you read the above source codes:

    1. Define the category metadata on the above Netlify config file
    2. Create an empty file named with categories.yml under meta directory
    3. Create a new module for fetching category metadata
    4. Display the category metadata on src/components/PostLayout.tsx or other components you want

    It is all you have to do. After that, you can access Netlify CMS and create new categories at any time.

    Locale settings for Netlify CMS

    Modify config.yml and index.html under public/admin directory as following instructions:

    Netlify CMS – Configuration Options #Locale

    References

    License

    MIT

    Visit original content creator repository https://github.com/wutali/nextjs-netlify-blog-template
  • awesome

    Vuetify Logo

    Awesome Vuetify Awesome

    Vuetify is a no design skills required UI Library with beautifully handcrafted Vue Components. Below you will find a collection of applications and tools that help to showcase the best of what Vuetify has to offer!

    If you have something that you think belongs here, feel free to reach out to us in the community.

    📢 Community

    📄 Docs 🚨 Issues 🏬 Store 🎮 Play 💬 Discord 🐦 Twitter 👽 Reddit

    Table of Contents

    🙌 Projects using Vuetify

    🏢 Open source solutions

    • Commandeer – A Desktop cloud management app Electron
    • EBMSoft.net – Software Development Company profile site
    • GenVue – Hostable, web application that lets confidential users upload and share private files NetCore
    • NocoDB – A Free & Open Source Airtable Alternative Github Nuxt Typescript
    • Open API Explorer – OpenApi Specification Explorer
    • Sheiley Shop – PWA to track personal purchases
    • httpSMS – Use your Android phone to send and receive SMS messages via an HTTP API Nuxt Typescript
    • zova-vuetify – zova-vuetify is a vue3 framework with ioc container. With the support of ioc container, defining reactive states no longer needs ref/reactive, nor ref.value

    Vuetify 3

    🛠 Components

    • Vuetify Notifier – Vuetify Notifier provides a seamless way to integrate Toast, Alert, Confirm, Dinamic dialogs, and directives into your Vuetify projects.
    • vuetify-color-field – Vuetify Color Field is a Vuetify VTextField Color Picker Component
    • vuetify-drilldown-table – The Vuetify Drilldown Table is a powerful component that enhances the functionality of the Vuetify framework’s v-data-table and v-data-table-server. It provides a recursive table structure, allowing you to display hierarchical data in a nested format.
    • vuetify-inline-fields – Vuetify Inline Fields Component Library offers a comprehensive collection of reusable UI components to create elegant and efficient inline form fields within your applications.
    • vuetify-resize-drawer – The vuetify-resize-drawer component extends the functionality of the v-navigation-drawer so that it is resizable by the user.
    • Vuetify3-Plus – A useful complement and improvement to Vuetify 3.
    • @qnx/vuetify – An extendable library of Vuetify form components & more.

    💡 Example projects

    Vuetify 2

    🛠 Components

    💡 Example projects

    🖼️ Themes

    ⌨️ Contribute

    1. Fork this repository to your own GitHub account and then clone it to your local device.
    2. Start making changes.
    3. Submit a pull request to the original repository.
    Visit original content creator repository https://github.com/vuetifyjs/awesome
  • Orderbook

    Orderbook Project

    This project is a basic implementation of an order book system, simulating a financial order book used in markets (stocks, commodities, or cryptocurrency). It supports both market and limit orders, allowing you to view and manage the order book through a command-line interface.

    Summary of Time Complexities

    • Adding an order: O(log N)
    • Filling an order (market or limit order): O(P * Q)
    • Best quote: O(1)
    • Printing the orderbook: O(P * Q)

    Where:

    • N is the number of unique price levels in the order book (bids or asks).
    • P is the number of price levels.
    • Q is the number of orders per price level.

    In practice, the time complexity can be highly dependent on the density of orders (Q) at each price level and the number of price levels (P) in the order book.

    Features

    • Market Orders: Execute orders immediately at the best available price.
    • Limit Orders: Place orders to buy or sell at a specified price.
    • Bid and Ask Sides: Track both buy (bid) and sell (ask) orders.
    • Orderbook Visualization: View the current state of the order book, showing best bid and ask prices.
    • Order Matching: Market orders match with the best available prices, while limit orders remain in the order book until filled or canceled.

    Files and Structure

    • main.cpp: The main program that handles user interaction, including submitting orders and displaying the order book.
    • orderbook.cpp: Implements the core functionality of the order book, including order handling, matching, and printing.
    • order.hpp: Defines the Order struct, which represents individual orders.
    • orderbook.hpp: Defines the Orderbook class that manages the order book and order matching.
    • print.hpp: Contains functions for printing the order book and transaction details (e.g., filled orders).
    • test.cpp: Contains unit tests that verify the order book’s functionality.
    • Makefile: A build automation file for compiling the project and running tests.

    How to Build

    1. Clone the repository:

      git clone https://github.com/Ayush272002/Orderbook.git
      cd Orderbook
    2. Install dependencies (if needed):
      This project requires a C++17 compatible compiler (e.g., g++).

    3. Build the project:
      To compile the main program and tests, simply run:

      make
    4. Run the main program:
      After building, you can run the program using:

      make run
    5. Run the tests:
      To run the unit tests and verify the order book functionality, use:

      make run_tests

    How to Use the Program

    Order Submission

    Once the program is running, you will be presented with a menu to interact with the order book:

    1. Print Orderbook: Displays the current state of the order book, including the best bid and ask prices, and their corresponding quantities.
    2. Submit Order: Allows you to submit a new order (either market or limit), specifying quantity, price, and side (buy or sell).

    Example Interaction:

    Options
    ————————————————————
    |1. Print Orderbook|
    |2. Submit Order   |
    ————————————————————
    Choice: 2
    
    Enter order type:
    0. Market order
    1. Limit order
    Selection: 1
    
    Enter side:
    0. Buy
    1. Sell
    Selection: 0
    
    Enter order quantity: 100
    Enter limit price: 101.50
    Submitting limit buy order for 100 units @ $101.50..
    

    Order Matching

    • Market Orders: The system will attempt to fill market orders immediately at the best available price from the order book.
    • Limit Orders: If the order cannot be matched immediately, it will be placed in the order book and will remain there until a matching order is found or the order is canceled.

    Order Fill Example:

    When a limit order is filled, the system will output the following:

    Filled 100/100 units @ $101.50 average price. Time taken: 230 nano seconds
    

    Print Orderbook

    To view the current order book, you can select the Print Orderbook option from the menu, which will display the bid (buy) and ask (sell) prices, as well as the quantities for each price level.

    Unit Tests

    This project includes unit tests to verify key functionalities of the order book system. The tests are written in C++ using Google Test (gtest).

    To execute the tests:

    make run_tests

    The tests include:

    • testAddOrder: Verifies that orders are correctly added to the order book.
    • testMarketOrderExecution: Ensures that market orders are filled at the best available price.
    • testLimitOrderExecution: Tests that limit orders are executed only when a matching order is available.
    • testBestQuote: Ensures that the best bid and ask prices are correctly retrieved.
    • testEmptyOrderbookBestQuote: Ensures that an empty order book returns zero as the best quote.
    • testMarketOrderWithoutLiquidity: Tests that a market order without available liquidity does not execute.
    • testLargeMarketOrder: Ensures that large market orders only fill up to the available liquidity.
    • testLimitOrderWithNoImmediateMatch: Tests that limit orders are correctly placed without immediate execution if no match exists.

    Future Improvements

    • Order Cancellations: Add functionality for canceling orders from the order book.
    • Advanced Order Types: Implement additional order types (e.g., Stop-Loss, Take-Profit).
    • Performance Optimizations: Optimize the order book for larger volumes of orders, improving speed and efficiency.
    • Web Interface: Create a web-based interface to provide a more user-friendly way to interact with the system.

    Contributing

    1. Fork this repository.
    2. Create your feature branch (git checkout -b feature-name).
    3. Commit your changes (git commit -am 'Add new feature').
    4. Push to the branch (git push origin feature-name).
    5. Open a pull request.

    License

    This project is licensed under the MIT License – see the LICENSE file for details.

    Visit original content creator repository
    https://github.com/Ayush272002/Orderbook

  • Jmeter-TestExamples

    Jmeter-TestExamples

    Description

    This repository contains practice scripts using Jmeter for performance testing.
    Below a basic guide on how to install,run, architecture folder structure and useful resources.

    Architecture folder structure

    • Google-JmeterExample >An example for a request to google and get performance results
    • Examples > Contains the csv sample files
    • Test Plan – IntroductionTestExamples > Contains the actual tests excercises
    • SourcesOfKnowledge > Contains the key tips, cheatsheet, pdf guide with terms

    Install

    The Apache JMeter™ application is open source software, a 100% pure Java application designed to load test functional behavior and measure performance. This repository is using version apache-jmeter-5.1.1. The tool can be downloaded at: https://jmeter.apache.org/download_jmeter.cgi

    Run Tests:

    How to run tests locally by UI

    • Install Jmeter
    • Double click in Jmeter batch file (jmeter.bat)
    • In the top menu go to File > Open and locate the file with the jmx extension (example: Jmeter-IntroductionTestsExamples.jmx)
    • Click on the green top play button > to run all tests
    • Under each ThreadGroup you can see a “View Results Tree”. To verify results of the tests individually
    • Summary report displays a table with results

    How to run tests from the command line

    • To run the testplan from the command line you need to open a command prompt
    • Traverse locally until jmeter bin folder is located (ex: \apache-jmeter-5.1.1\bin)
    • Run the command: jmeter -n -t -l
    • Parameters:
        -n: This specifies JMeter is to run in cli mode
        -t [name of JMX file that contains the Test Plan].
        -l [name of JTL file to log sample results to]
        .-j [name of JMeter run log file].
        – r Run the test in the servers specified by the JMeter property “remote_hosts”
        -R [list of remote servers] Run the test in the specified remote servers
        -g [path to CSV file] generate report dashboard only-egenerate report dashboard after load test
        -o output folder where to generate the report dashboard after load test. Folder must not exist or be empty

    External references:

    Visit original content creator repository
    https://github.com/aisabel/Jmeter-TestExamples

  • alpine-timeago

    ⏱ Alpine TimeAgo ⏱

    An Alpine.js plugin to return the distance between a given date and now in words (like “3 months ago”, “about 2 hours ago” or “in about 5 hours”).

    version Build size downloads JSDelivr GitHub Gitmoji

    🚀 Installation

    CDN

    Include the following <script> tag in the <head> of your document, just before Alpine.

    <script src="https://cdn.jsdelivr.net/npm/@marcreichel/alpine-timeago@latest/dist/alpine-timeago.min.js" defer></script>

    NPM

    npm install @marcreichel/alpine-timeago

    Add the x-timeago directive to your project by importing the package before starting Alpine.

    import Alpine from 'alpinejs';
    import TimeAgo from '@marcreichel/alpine-timeago';
    
    Alpine.plugin(TimeAgo);
    
    Alpine.start();

    🪄 Usage

    Directive

    To convert a Date to the human-readable distance from now, add the x-data and x-timeago directives to an element and pass the date (as a Date or a string in ISO format) to the x-timeago directive. The directive will update the output every 30 seconds.

    <span x-data="{ date: new Date() }" x-timeago="date"></span>

    Under the hood the directive is using formatDistanceToNow from date-fns.

    No suffix

    If you do not want the “[diff] ago” suffix or “in [diff]” prefix, you can use the x-timeago.pure modifier.

    <span x-data="{ date: new Date() }" x-timeago.pure="date"></span>

    Include seconds

    Distances less than a minute are more detailed.

    <span x-data="{ date: new Date() }" x-timeago.seconds="date"></span>

    Strict

    If you do not want the “about [diff]” or “less than [diff]” prefixes, you can use the x-timeago.strict modifier.

    <span x-data="{ date: new Date() }" x-timeago.strict="date"></span>

    Strict options

    The strict mode comes with its own set of modifiers for controlling the output.

    Force unit

    Use the x-timeago.strict.unit.[unit] modifier with one of the following units to force the unit in the output.

    • second (e.g. x-timeago.strict.unit.second)
    • minute (e.g. x-timeago.strict.unit.minute)
    • hour (e.g. x-timeago.strict.unit.hour)
    • day (e.g. x-timeago.strict.unit.day)
    • month (e.g. x-timeago.strict.unit.month)
    • year (e.g. x-timeago.strict.unit.year)
    Adjust rounding method

    By default, the values are rounded using the Math.round algorithm. If you would like to adjust this, use the x-timeago.rounding.[method] modifier with one of the following methods:

    • floor (e.g. x-timeago.strict.rounding.floor)
    • ceil (e.g. x-timeago.strict.rounding.ceil)
    • floor (e.g. x-timeago.strict.rounding.round)

    Magic function

    As of version 1.3.0 of this package a $timeago magic function is included which will return the human-readable distance from now.

    <span x-data="{ date: new Date() }" x-text="$timeago(date)"></span>

    Note: Using the magic function the distance does not get updated automatically. You have to update it yourself if you want to.

    No suffix

    If you do not want the “[diff] ago” suffix or “in [diff]” prefix, you can provide true as the second parameter to the function.

    <span x-data="{ date: new Date() }" x-text="$timeago(date, true)"></span>

    Include seconds

    If you want distances less than a minute to be more detailed, you can provide true as the third parameter to the function.

    <span x-data="{ date: new Date() }" x-text="$timeago(date, null, true)"></span>

    Strict

    If you do not want the “about [diff]” or “less than [diff]” prefixes, you can use the fourth parameter to provide the ” strict” options.

    Default
    <span x-data="{ date: new Date() }"
          x-text="$timeago(date, null, null, { strict: true })"></span>
    Unit
    <span x-data="{ date: new Date() }"
          x-text="$timeago(date, null, null, { strict: true, unit: 'second' })"></span>
    Rounding method
    <span x-data="{ date: new Date() }"
          x-text="$timeago(date, null, null, { strict: true, roundingMethod: 'floor' })"></span>

    Other locales

    If you are using the npm installation method for this package or the ESM distribution, you can use the TimeAgo.configure() method to provide a different locale from date-fns.

    import TimeAgo from '@marcreichel/alpine-timeago';
    import {de} from 'date-fns/locale';
    
    Alpine.plugin(TimeAgo.configure({
        locale: de,
    }));

    📄 License

    Copyright (c) 2022 Marc Reichel and contributors.

    Licensed under the MIT license, see LICENSE for details.

    Visit original content creator repository https://github.com/marcreichel/alpine-timeago
  • JMSDataLinking

    This is the readme file for the programs and general procedure used in the Journal of Molecular Spectroscopy article "Are your spectroscopic data being used?", by Iouli E. Gordon, Megan R. Potterbusch, Daina Bouquin, Christopher C. Erdmann,  Jonas S. Wilzewski and Laurence S. Rothman.
    The clean data created by these programs are shown in Figures 3 and 4 of this article. Papers published in the Journal of Molecular Spectroscopy in Year1-Year2 were analysed for: 1. Amount of working and broken web links provided in the articles., 2. How many of these links point to curated archives, and 3. How many times each article was cited based on the statistics in the Astrophysical Data System (ADS).
    Below we describe the steps of the procedure and the programs provided in this repository.
    
    Before starting any data cleaning or processing, we received full-text, raw-XML copies of the Journal of Molecular Spectroscopy.
    
    Using extract.py we removed the XML tags from the full-text and then used regular expressions to extract the links and the pre link text from the full-text articles.  The format expected by the extract.py program is MainFolder->SubFoldersByVolume->Articles.xml
    
    Steps taken to clean up the URLs in order to run link_checker.ipynb:
    - Added a duplicate column for "clean_link_text_not_article", which includes only the non-self-referential links on which all following actions were taken to preserve the original information in "link_text"
    - Split URLs on "[" and "]"
    - Removed the trailing symbols: ".", ",", "<", ">", "(", ")", ";", and "https://github.com/"
    - Removed trailing words "appendix" and "supplement" (pattern indicated these words were not part of actual links, but should have been the next word after the link)
    
    HTTP status (from all levels):
    All 200 codes returned are considered good
    for 301, 302, and 303:
    	Redirect locations have been checked.
    	For these redirects:
    		301 are generally good
    		302 are generally good		
    		303 are bad
    
    403, 404, 502, and 503 are considered bad in general
    	2 of the 503 links go to actual science direct articles and may be OK.
    
    check_new_location_for_300.ipynb
    - Eventually, this should be combined with the original link checker, because there is a great deal of duplication between the two, but for now this should be run after link_checker.pynb
    
    
    Workflow:
    - clean the data as mentioned above
    - run link_checker
    -- this adds columns for status and headers for URLs provided in the article (returned using the requests library)
    - run check_location_for_300
    -- this adds columns for the new/temporary/perminant "location" for all URLs that returned 300-304 statuses (these are refered to as status2, header2, and url2)
    -- the locations are provided in the header fields
    -- new columns are added to the dataframe
    -- the new columns are: HTTPstatus2, HTTPheaders2, and URL2 (these are based on the reference location given in the header from the first status call.  AKA These columns have the same info as the original Status, Header, and URL information but the URL used to populate them was given in the header of the first URL) The 2 at the end signifies that this is the second URL that I tried use to get to the correct page.
    - run check_locations_for_300 again but change input "status" and "header" from column: "HTTPstatus" and "HTTPheaders" to "HTTPstatus2" and "HTTPheaders2" (so that the status and the header used by the script are from the second URL).
    -- this adds 3 more columns: HTTPstatus3, HTTPheaders3, and URL3.  The three indicates that this is the third URL that I tried programatically.
    -- Use AddTheStatusListAndStatusOverviewColumn.ipynb to add "TheStatusList" column for the final status code and a "StatusOverview" column for if we are classifying the links as Active or Broken. 
    -- Essentially what that code does:
    	Psudo code for next step:
    	if HTTPstatus3 is not null:
    		if value does not equal "error getting status2"
    			add value of status3 to new column X
    		else
    			add value of status2 to column X 
    			(I found that over 133 of the 139 instences of an "error getting status2" were elsevier links that used 	"http://linkinghub.elsevier.com/retrieve", which is probably what created the unusual error)
    
    	ifelse HTTPstatus2 is not null:
    		add value to column X
    	else
    		add value from HTTPstatus to column X
    
    	if HTTPheaders3 == "error getting status2" and status2 == 302:
    		URL is broken
    	if HTTPheaders3 == "error getting status2" and status2 == 301:
    		URL is active
    
    	Add "statusOverview" column for:
    		if 200, 301, 302:
    			ACTIVE
    		else:
    			BROKEN
    
    
    Run get_citation_count_data_ADS_API.ipynb on data:
    Open csv (hardcoded location) with a column of DOIs |
    takes DOIs from dataframe |
    Uses ADS API to search by DOI and return citation_count and pubdate  (publication date) |
    Makes each into a list |
    Adds lists to dataframe as new columns |
    Outputs to csv (hardcoded location)
    
    Add a column for year based on the date in the new csv
    
    
    Group by DOI
    For each DOI: # of links, year published
    	# of links per article per year
    
    Citations overtime by article
    	DOI of paper, # of citation
    
    Exclude duplicates based on DOI!
    
    
    Used the GREL filter:  
    	isNotNull(value.match(/.*jmsa_hp.*|.*dx\.doi.*/))
    	to create column "trustedRepo", which contains true or false info.  True == Ohio State or if it is a link to a doi.  If it's a doi that means that it is in a trusted repo, because it has to be compliant with DOI requirements. (Most of the DOIs point to Elsevier.) 
    	To use regular expresions to find strings in a column, follow the example above. All GREL REs start and end with a backslash, /.  The pipe, |, works as the boolean AND. the dot, ., and the astrix, *, are vital to the RE.  
    
    Questions? Contact me at mpotterbusch@gmail.com

    Visit original content creator repository
    https://github.com/LibrarPotter/JMSDataLinking

  • PDFManager

    OpenPDFManager 📄

    A free and open-source cross-platform PDF Management Software.

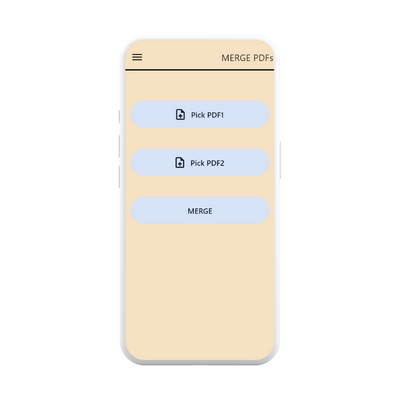
    The goal of this project is to provide an all-in-one PDF toolkit that allows users to extract, rotate, and delete pages instantly, as well as combine PDFs, all in just a few clicks.

    Additionally, we aim to create a nice graphical user interface to make the tool accessible to a larger audience.

    version github license

    Built with ❤️ at FOSSHack 3.0!

    Table of Contents

    Goals

    • The goal of the project is to create a PDFManager which supports all the operations performed a PDF into a nice GUI.
    • The PDFManager is an oofline toolkit for all your PDF related issues.
    • The goal is to also make a cross-platform application.

    Features

    The OpenPDFManager currently supports the following features:

    • Merge two PDFs
    • Offline Support

    Features to implement/come in future:

    • Split PDF
    • Trim PDF
    • Encrypt PDF
    • Decrypt PDF (Brute Force and Other Techniques)
    • Rotate Pages of a PDF
    • Select and Merge Feature
    • Preview before download Feature

    The OpenPDFManager is developed in Python using flet (a relatively new GUI library for python). This would serve as a personal project and a guide for any new flet learners.

    Installation

    Prerequisites:

    • python must be installed on your system. To install it, refer this
    • git should also be present. Refer this
    • That’s all you need!!! 😉

    Now, go into your terminal and run the following commands step-by-step:

    1. Clone the Reposistory
    git clone git@github.com:peb-peb/PDFManager.git
    
    1. Install all the external libraries using
    pip install -r requirements.txt
    
    1. Run the OpenPDFManager
    flet src\pdfmanager\pdfmanager.py
    

    Contribution

    Contributions are always welcomed 🤗. Refer CONTRIBUTING for more info.

    License

    Licensed under the MIT License, see LICENSE for more information.

    Acknowledgements

    Resources refered during FOSS Hack 3.0 –

    FAQ

    FOSSHack Questionnaire:

    Q. What was the idea for the project?

    I frequently required to perform many operations on PDF due to my College Assignments.

    Q. What stage is it in now?

    The Application was built in 2 days in FOSS Hack 3.0. So, it currently supports only the merge feature, but, soon I’ll be adding other features to it.


    Visit original content creator repository https://github.com/peb-peb/PDFManager
  • state_composer

    State Composer

    Create state machines in dart using object composition
    Next steps are to add parallel states and transition guards

    Usage

    Example of a simple machine with two states

    Instanciate your StateMachine passing its id, i.e. a unique name, the inintial state id and a list of states
    Each ComposerState also have an id that can really be whatever you want to call it, as long as there is no other state with this name
    States execute stuff through onEnter and onLeave functions.
    onEnter will pass the last and current states
    onLeave will pass the current and next states
    Ps: those functions accept futures
    All transitions that a state is allowed to make must be inside the transitions list. A Transition also receives an id,
    and the id of the state that you want to go to

    machine = StateMachine(
      id: "machine1",
      initialStateId: "A",
      states: [
        ComposerState(
          id: "A",
          onEnter: (stateMachine) async {
            test("onEnter A Last State Should be Null", () {
              expect(stateMachine.lastState, null);
            });
            test("onEnter A Current State ID Should be A", () {
              expect(stateMachine.currentState!.id, "A");
            });
            print("Entered A");
          },
          onLeave: (stateMachine, nextState) async {
            print("Leaving A");
    
            expect(stateMachine.currentState!.id, "A");
            expect(nextState.id, "B");
    
            await Future.delayed(Duration(seconds: 3));
            print("Leaving A future completed");
          },
          transitions: [
            Transition(id: "A=>B", to: "B"),
          ],
        ),
        ComposerState(
          id: "B",
          onEnter: (stateMachine) {
            print("Entered B");
    
            expect(stateMachine.lastState!.id, "A");
            expect(stateMachine.currentState!.id, "B");
          },
          onLeave: (currentState, nextState) {
            print("leaving B");
    
            expect(currentState.id, "B");
            expect(nextState.id, "A");
          },
          transitions: [
            Transition(id: "B=>A", to: "A"),
          ],
        )
      ],
    );

    Transitioning between states

    print(machine.currentState!.id) //A
    await machine.transitionTo("B");
    //Leaving A
    //Leaving A future completed
    //Entered B
    print(machine.currentState!.id) //B

    Generic State and Transition Types

    You can create personalized states and transitions that extends ComposerState and Transition. To see an
    example look at flutter_chat_composer’s model
    that extends state_composer to create a chatbot based on state machines

    Listening to State Changes

    Use the state machines’ stateStream to listen the state changes

    machine.stateStream.listen((currentState) {
      print("State Changed to ${currentState.id}");
    });

    Visit original content creator repository
    https://github.com/FelipeMarra/state_composer

  • crud_series-php_laravel

    Laravel: crie aplicações web em PHP

    Laravel: criando uma aplicação com MVC

    Que facilidades um framework full-stack como Laravel pode nos trazer?

    • Auxílio com SQL (usando ORM), logs, tratamento de erros, etc.

    Instalando o Laravel

    composer create-project laravel/laravel controle-series ^9
    

    Definindo a primeira rota

    php artisan
    php artisan serve

    php artisan serve --host=0.0.0.0 --port=8000
    http://localhost:8000/series

    Qual a sintaxe para criar uma nova rota no Laravel?

    Route::{verbo http}('{sua rota}', {Código a ser executado});
    • Nós podemos ter rotas com Route::get, Route::post, Route::put, Route::delete, etc.
    • Todos os verbos HTTP são válidos aqui.

    Convenções de nome

    php artisan make:controller SeriesController
    php artisan make:controller PhotoController --resource

    Lidando com Request e Response

    $request->get('id');
    $request->url();
    $request->method();
    $request->input();
    
    response('', 302, ['Location' => 'https://google.com']);
    redirect('https://google.com');

    O que a função response faz?

    • Ela retorna um objeto do tipo Response com o corpo, status e cabeçalhos.

    Criando um Layout

    php artisan make:component Titulo

    O que precisamos fazer para termos um componente do blade?

    • Criar um arquivo .blade.php no diretório resources/views/components.

    Mais funcionalidades

    @{{ nome }}
    
    const series = {{ json_encode($series) }};
    const series = {{ Js::from($series) }};
    

    Entendendo o conceito – Laravel Mix

    npm install
    

    Vite e Mix

    npm install laravel-mix --save-dev
    

    Laravel Mix

    • Apesar de ser recomendado pela equipe do Laravel, é um pacote JavaScript.

    Instalando o Bootstrap

    npm install bootstrap
    
    npm run dev
    

    Qual o propósito da função asset?

    • Nos retornar o caminho de um asset (arquivo estático) que pode inclusive estar em outro domínio.

    Por que não devemos ter informações sensíveis (como credenciais) em nosso código?

    • Pois isso pode expor nossa segurança.
    • Porque podemos ter credenciais diferentes em ambientes diferentes.

    Migrations

    php artisan make:migration create_series_table
    php artisan migrate

    Além de simplesmente executar um CREATE TABLE, quais outras vantagens obtemos ao utilizar migrations?

    • Sincronização dos bancos locais da equipe.
    • Versionamento do banco.

    DB Facade

    use Illuminate\Support\Facades\DB;
    
    DB::select('SELECT nome FROM series');
    DB::insert('INSERT INTO series (nome) VALUES (?)', [$nomeSerie]);

    CSRF (Cross-Site Request Forgery)

    • O Laravel possui uma proteção contra um ataque chamado Cross-Site Request Forgery (CSRF).
    • Todo formulário que nós enviamos para o Laravel precisa ter uma informação extra: um token.
    • Esse token permite que o Laravel verifique que a requisição realmente foi enviada por um formulário do site.
    • Felizmente essa informação é simples de se adicionar, bastando usar a diretiva @csrf do blade.

    Eloquent ORM

    php artisan make:model Serie

    Building Queries

    Laravel: validando formulários, usando sessões e definindo relacionamentos

    Criando séries

    Serie::create($request->all());
    Serie::create($request->only(['nome', 'genero']));
    Serie::create($request->except(['_token']));

    Visit original content creator repository
    https://github.com/lucasrmagalhaes/crud_series-php_laravel