Author: 95xvxpg1j2dk

  • ufbx

    ufbx CI codecov

    Single source file FBX file loader.

    ufbx_load_opts opts = { 0 }; // Optional, pass NULL for defaults
    ufbx_error error; // Optional, pass NULL if you don't care about errors
    ufbx_scene *scene = ufbx_load_file("thing.fbx", &opts, &error);
    if (!scene) {
        fprintf(stderr, "Failed to load: %s\n", error.description.data);
        exit(1);
    }
    
    // Use and inspect `scene`, it's just plain data!
    
    // Let's just list all objects within the scene for example:
    for (size_t i = 0; i < scene->nodes.count; i++) {
        ufbx_node *node = scene->nodes.data[i];
        if (node->is_root) continue;
    
        printf("Object: %s\n", node->name.data);
        if (node->mesh) {
            printf("-> mesh with %zu faces\n", node->mesh->faces.count);
        }
    }
    
    ufbx_free_scene(scene);

    Documentation

    Online documentation

    Setup

    Copy ufbx.h and ufbx.c to your project, ufbx.c needs to be compiled as C99/C++11 or more recent. You can also add misc/ufbx.natvis to get debug formatting for the types.

    Features

    The goal is to be at feature parity with the official FBX SDK.

    • Supports binary and ASCII FBX files starting from version 3000
    • Safe
      • Invalid files and out-of-memory conditions are handled gracefully
      • Loaded scenes are sanitized by default, no out-of-bounds indices or non-UTF-8 strings
      • Extensively tested
    • Various object types
      • Meshes, skinning, blend shapes
      • Lights and cameras
      • Embedded textures
      • NURBS curves and surfaces
      • Geometry caches
      • LOD groups
      • Display/selection sets
      • Rigging constraints
    • Unified PBR material from known vendor-specific materials
    • Various utilities for evaluating the scene (can be compiled out if not needed)
      • Polygon triangulation
      • Index generation
      • Animation curve evaluation / layer blending
      • CPU skinning evaluation
      • Subdivision surface evaluation
      • NURBS curve/surface tessellation
    • Progress reporting and cancellation
    • Support for Wavefront .obj files as well

    Platforms

    The library is written in portable C (also compiles as C++) and should work on almost any platform without modification. If compiled as pre-C11/C++11 on an unknown compiler (not MSVC/Clang/GCC/TCC), some functions will not be thread-safe as C99 does not have support for atomics.

    The following platforms are tested on CI and produce bit-exact results:

    • Windows: MSVC x64/x86, Clang x64/x86, GCC MinGW x64
    • macOS: Clang x64, GCC x64
    • Linux: Clang x64/x86/ARM64/ARM32/PowerPC, GCC x64/x86/ARM64/ARM32, TCC x64/x86
    • WASI: Clang WASM

    Testing

    • Internal tests run on all platforms listed above
      • 592 test cases / 604 FBX files
    • Fuzzed in multiple layers
      • Parsers (fbx binary/fbx ascii/deflate/xml/mcx/obj/mtl) fuzzed using AFL
      • Structured FBX binary/ascii fuzzing using AFL
      • Built-in fuzzing for byte modifications/truncation/out-of-memory
      • Semantic fuzzing for binary FBX and OBJ files
    • Public dataset: 4.7GB / 323 files
      • Loaded, validated, and compared against reference .obj files
    • Private dataset: 33.6GB / 12618 files
      • Loaded and validated
    • Static analysis for maximum stack depth on Linux GCC/Clang
    • In total 95% branch line coverage (99% partial line coverage)

    Versioning

    The latest commit in the master branch contains the latest stable version of the library.

    Older versions are tagged as vX.Y.Z, patch updates (Z) are ABI compatible and work with older versions of the header from the same minor version (Y). Minor versions within a major verision (X) are expected to be source compatible after 1.0.0 but the 0.Y.Z releases can break for every minor release.

    License

    ------------------------------------------------------------------------------
    This software is available under 2 licenses -- choose whichever you prefer.
    ------------------------------------------------------------------------------
    ALTERNATIVE A - MIT License
    Copyright (c) 2020 Samuli Raivio
    Permission is hereby granted, free of charge, to any person obtaining a copy of
    this software and associated documentation files (the "Software"), to deal in
    the Software without restriction, including without limitation the rights to
    use, copy, modify, merge, publish, distribute, sublicense, and/or sell copies
    of the Software, and to permit persons to whom the Software is furnished to do
    so, subject to the following conditions:
    The above copyright notice and this permission notice shall be included in all
    copies or substantial portions of the Software.
    THE SOFTWARE IS PROVIDED "AS IS", WITHOUT WARRANTY OF ANY KIND, EXPRESS OR
    IMPLIED, INCLUDING BUT NOT LIMITED TO THE WARRANTIES OF MERCHANTABILITY,
    FITNESS FOR A PARTICULAR PURPOSE AND NONINFRINGEMENT. IN NO EVENT SHALL THE
    AUTHORS OR COPYRIGHT HOLDERS BE LIABLE FOR ANY CLAIM, DAMAGES OR OTHER
    LIABILITY, WHETHER IN AN ACTION OF CONTRACT, TORT OR OTHERWISE, ARISING FROM,
    OUT OF OR IN CONNECTION WITH THE SOFTWARE OR THE USE OR OTHER DEALINGS IN THE
    SOFTWARE.
    ------------------------------------------------------------------------------
    ALTERNATIVE B - Public Domain (www.unlicense.org)
    This is free and unencumbered software released into the public domain.
    Anyone is free to copy, modify, publish, use, compile, sell, or distribute this
    software, either in source code form or as a compiled binary, for any purpose,
    commercial or non-commercial, and by any means.
    In jurisdictions that recognize copyright laws, the author or authors of this
    software dedicate any and all copyright interest in the software to the public
    domain. We make this dedication for the benefit of the public at large and to
    the detriment of our heirs and successors. We intend this dedication to be an
    overt act of relinquishment in perpetuity of all present and future rights to
    this software under copyright law.
    THE SOFTWARE IS PROVIDED "AS IS", WITHOUT WARRANTY OF ANY KIND, EXPRESS OR
    IMPLIED, INCLUDING BUT NOT LIMITED TO THE WARRANTIES OF MERCHANTABILITY,
    FITNESS FOR A PARTICULAR PURPOSE AND NONINFRINGEMENT. IN NO EVENT SHALL THE
    AUTHORS BE LIABLE FOR ANY CLAIM, DAMAGES OR OTHER LIABILITY, WHETHER IN AN
    ACTION OF CONTRACT, TORT OR OTHERWISE, ARISING FROM, OUT OF OR IN CONNECTION
    WITH THE SOFTWARE OR THE USE OR OTHER DEALINGS IN THE SOFTWARE.
    ----------------------------------------
    
    Visit original content creator repository https://github.com/ufbx/ufbx
  • terraform-aws-ssmpatching

    terraform-aws-ssmpatching

    Verify and Bump Latest Release GitHub tag (latest SemVer) Terraform VersionInfrastructure Tests pre-commit checkov Infrastructure Tests

    Terraform module to provision SSM scheme. Sets up task and patch window to apply to instances tagged with PatchGroup Key and a set value.


    It’s 100% Open Source and licensed under the APACHE2.

    Usage

    module "ssmpatching" {
       source               = "JamesWoolfenden/ssmpatching/aws"
       version              = "0.1.7"
       common_tags          = var.common_tags
       patchbaseline_arn_id = var.patchbaseline_arn_id
       patchgroup           = var.patchgroup
       cron                 = var.cron
       task                 = var.task
    }

    Requirements

    No requirements.

    Providers

    Name Version
    aws n/a

    Modules

    No modules.

    Resources

    Name Type
    aws_iam_role.patchaccess resource
    aws_iam_role_policy.patchaccess resource
    aws_ssm_maintenance_window.production resource
    aws_ssm_maintenance_window_target.target resource
    aws_ssm_maintenance_window_task.task resource
    aws_ssm_patch_group.patchgroup resource

    Inputs

    Name Description Type Default Required
    cron The Cron statement to control the patch schedule string n/a yes
    patchbaseline_arn_id This is an AWS variable that describe the patch baseline string n/a yes
    patchgroup A named group of servers to apply tasks to string n/a yes
    task Contains the task details and command map
    {
    "name": "commands",
    "values": [
    "yum update -y; reboot"
    ]
    }
    no

    Outputs

    Name Description
    maintenance_window n/a
    patchgroup n/a
    task n/a
    window_target n/a

    Policy

    This is the policy required to build this project:

    The Terraform resource required is:

    resource "aws_iam_policy" "terraform_pike" {
      name_prefix = "terraform_pike"
      path        = "https://github.com/"
      description = "Pike Autogenerated policy from IAC"
    
      policy = jsonencode({
        "Version": "2012-10-17",
        "Statement": [
            {
                "Sid": "VisualEditor0",
                "Effect": "Allow",
                "Action": [
                    "iam:CreateRole",
                    "iam:DeleteRole",
                    "iam:DeleteRolePolicy",
                    "iam:GetRole",
                    "iam:GetRolePolicy",
                    "iam:ListAttachedRolePolicies",
                    "iam:ListInstanceProfilesForRole",
                    "iam:ListRolePolicies",
                    "iam:PutRolePolicy"
                ],
                "Resource": "*"
            },
            {
                "Sid": "VisualEditor1",
                "Effect": "Allow",
                "Action": [
                    "ssm:CreateMaintenanceWindow",
                    "ssm:DeleteMaintenanceWindow",
                    "ssm:DeregisterPatchBaselineForPatchGroup",
                    "ssm:DeregisterTargetFromMaintenanceWindow",
                    "ssm:DeregisterTaskFromMaintenanceWindow",
                    "ssm:DescribeMaintenanceWindowTargets",
                    "ssm:DescribeMaintenanceWindowTasks",
                    "ssm:DescribePatchGroups",
                    "ssm:GetMaintenanceWindow",
                    "ssm:ListTagsForResource",
                    "ssm:RegisterPatchBaselineForPatchGroup",
                    "ssm:RegisterTargetWithMaintenanceWindow",
                    "ssm:RegisterTaskWithMaintenanceWindow",
                    "ssm:UpdateMaintenanceWindow"
                ],
                "Resource": "*"
            }
        ]
    })
    }
    

    Related Projects

    Check out these related projects.

    Help

    Got a question?

    File a GitHub issue.

    Contributing

    Bug Reports & Feature Requests

    Please use the issue tracker to report any bugs or file feature requests.

    Copyrights

    Copyright © 2019-2022 James Woolfenden

    License

    License

    See LICENSE for full details.

    Licensed to the Apache Software Foundation (ASF) under one or more contributor license agreements. See the NOTICE file distributed with this work for additional information regarding copyright ownership. The ASF licenses this file to you under the Apache License, Version 2.0 (the “License”); you may not use this file except in compliance with the License. You may obtain a copy of the License at

    https://www.apache.org/licenses/LICENSE-2.0

    Unless required by applicable law or agreed to in writing, software distributed under the License is distributed on an “AS IS” BASIS, WITHOUT WARRANTIES OR CONDITIONS OF ANY KIND, either express or implied. See the License for the specific language governing permissions and limitations under the License.

    Contributors

    James Woolfenden
    James Woolfenden

    Visit original content creator repository https://github.com/JamesWoolfenden/terraform-aws-ssmpatching
  • Angular4-PhotoGallery

    Angular4-PhotoGallery Application

    A simple gallery application developed using Angular4 and a custom Pipe is used to build a filterable photo gallery.
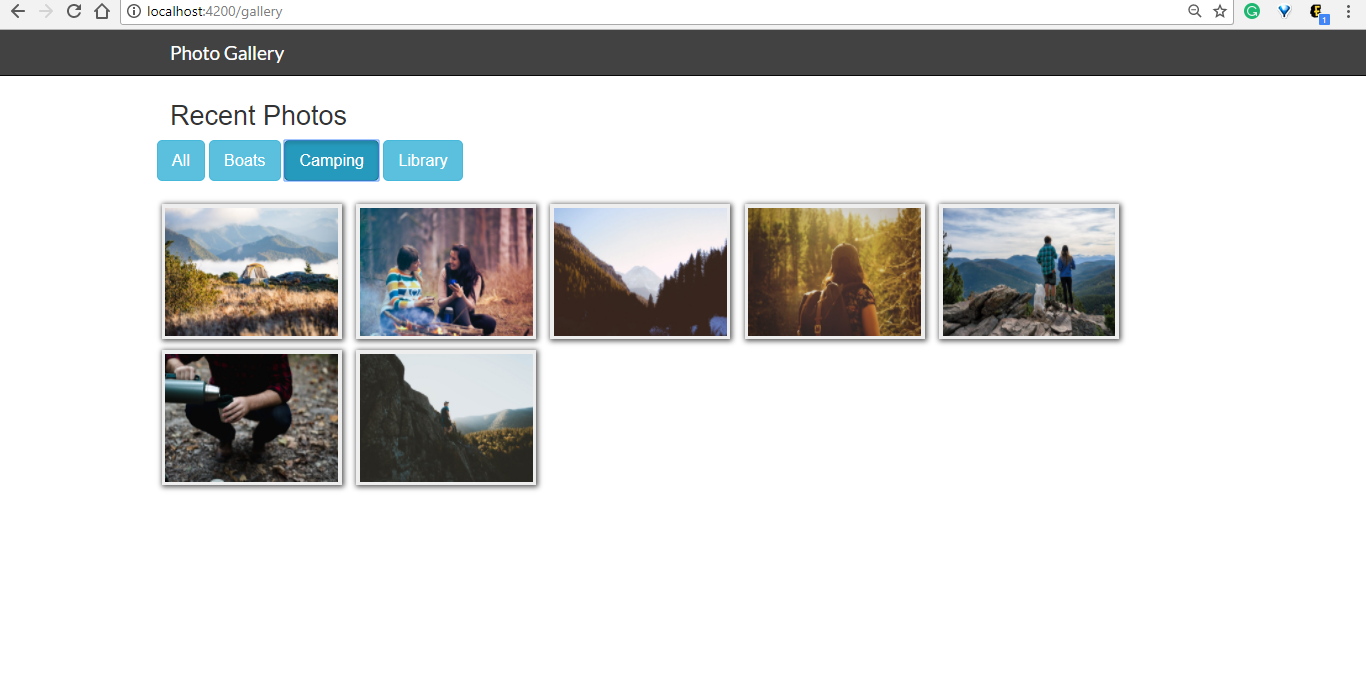
    We will have different set of categories and depending on the selection photo gallery will be filtered.
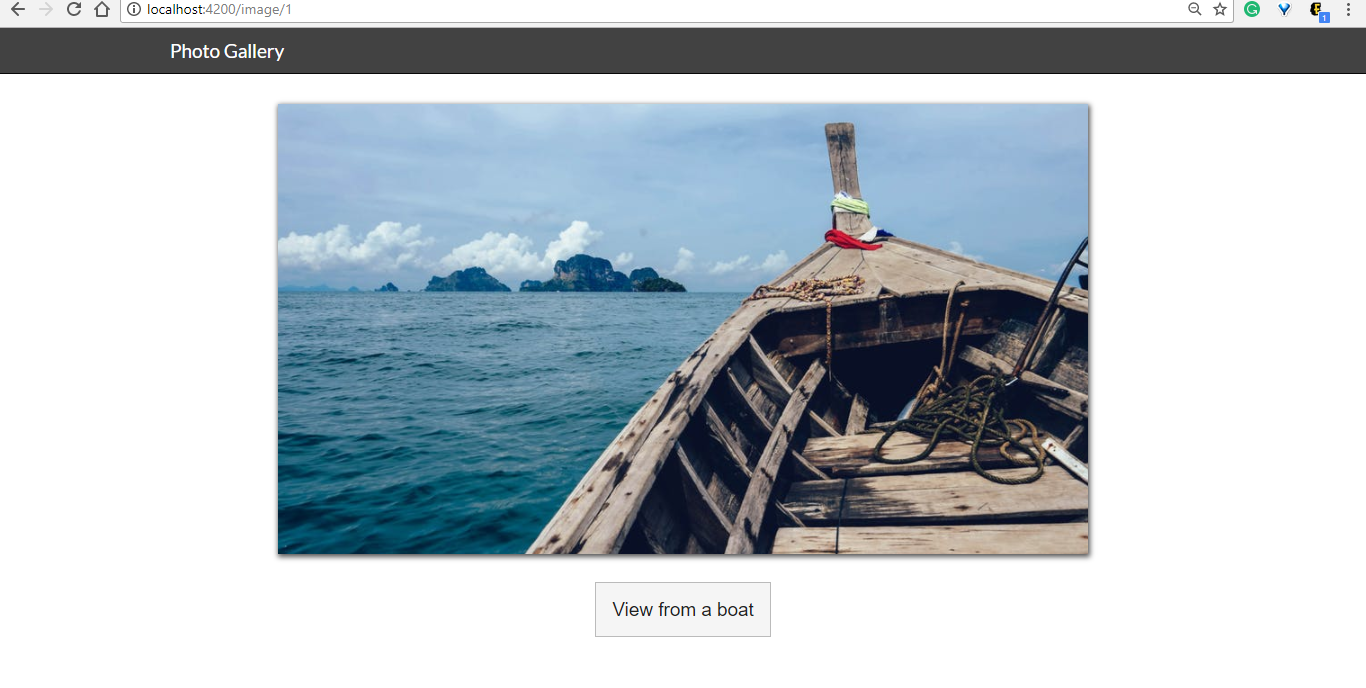
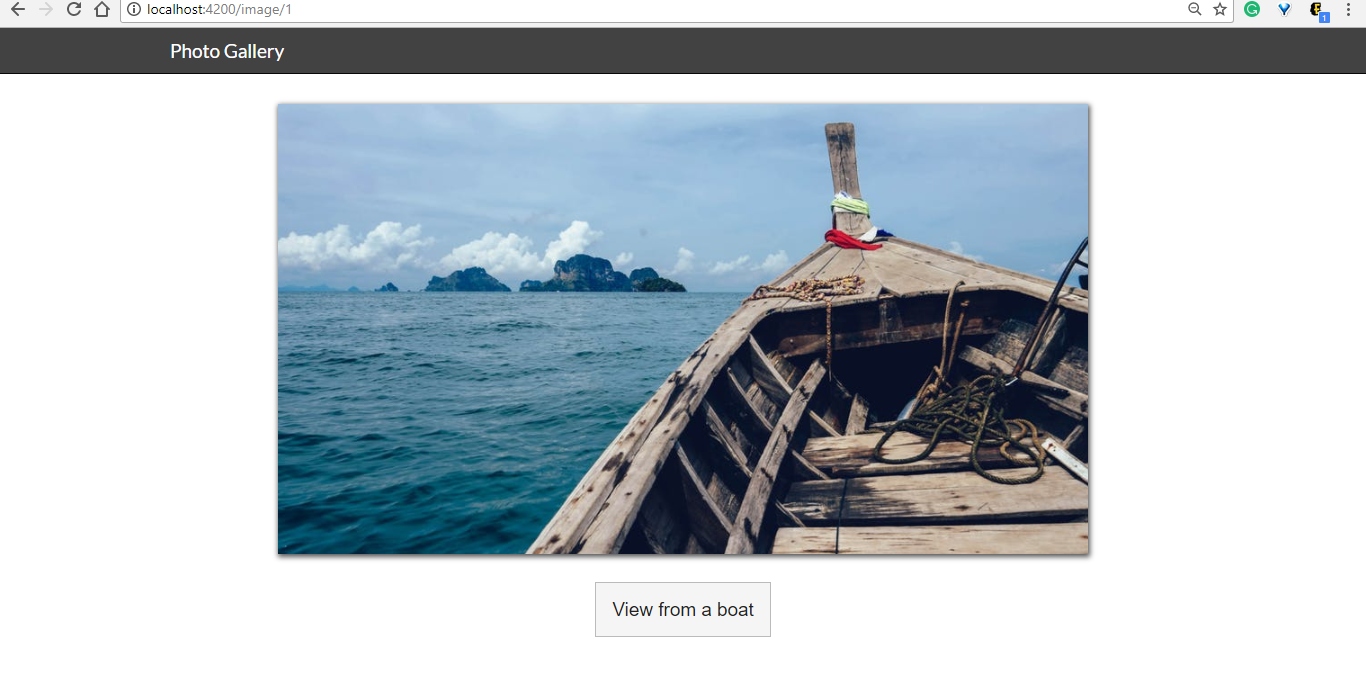
    If we click on the image, we can view enlarged image with its caption.
    Each image will have a metadata associated with it.


    Metadata of an image will include
  • Caption
  • Category value
  • This metadata can be used to dynamically generate the filters.


    Application is deployed on Heroku: https://photogalleryapp1.herokuapp.com/gallery

    Pre-requisites

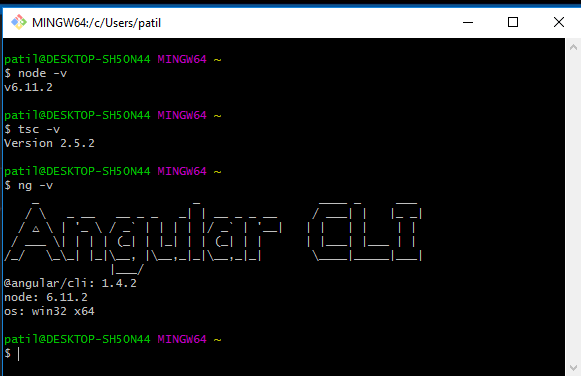
  • Node.js
  • TypeScript
  • Angular CLI


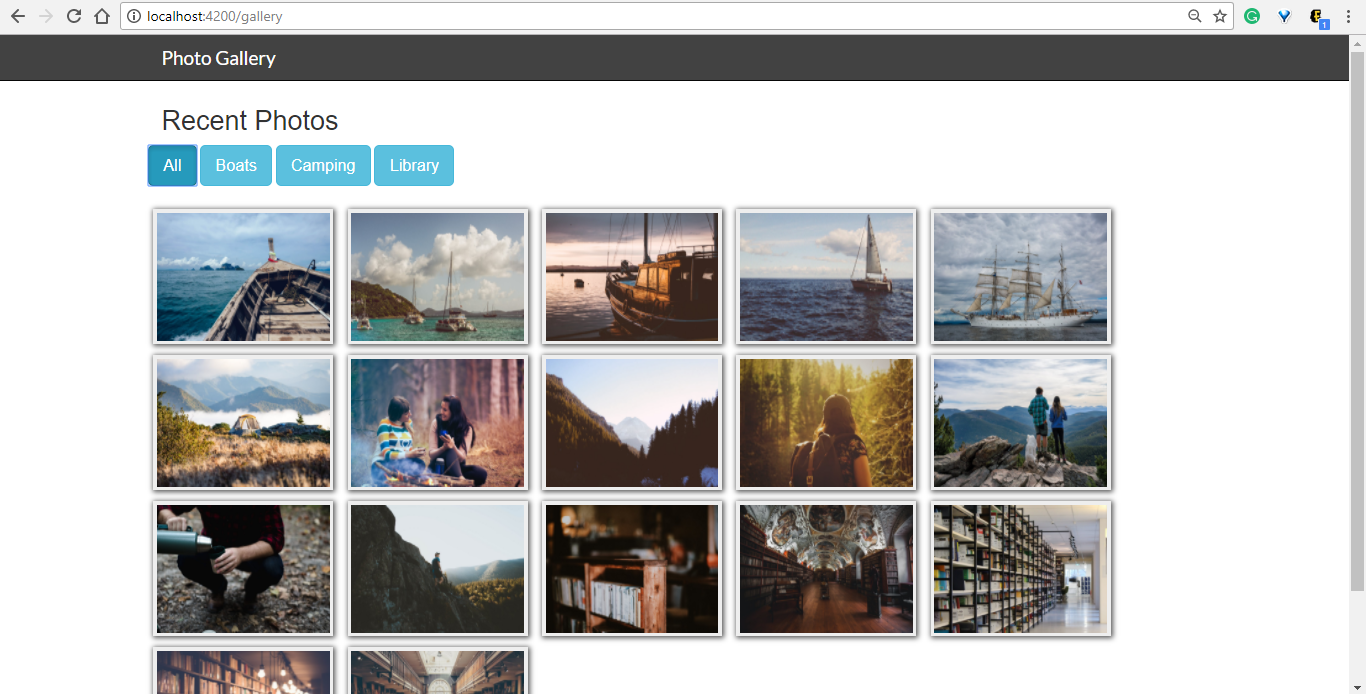
  • Screenshots

    All images in the photo gallery

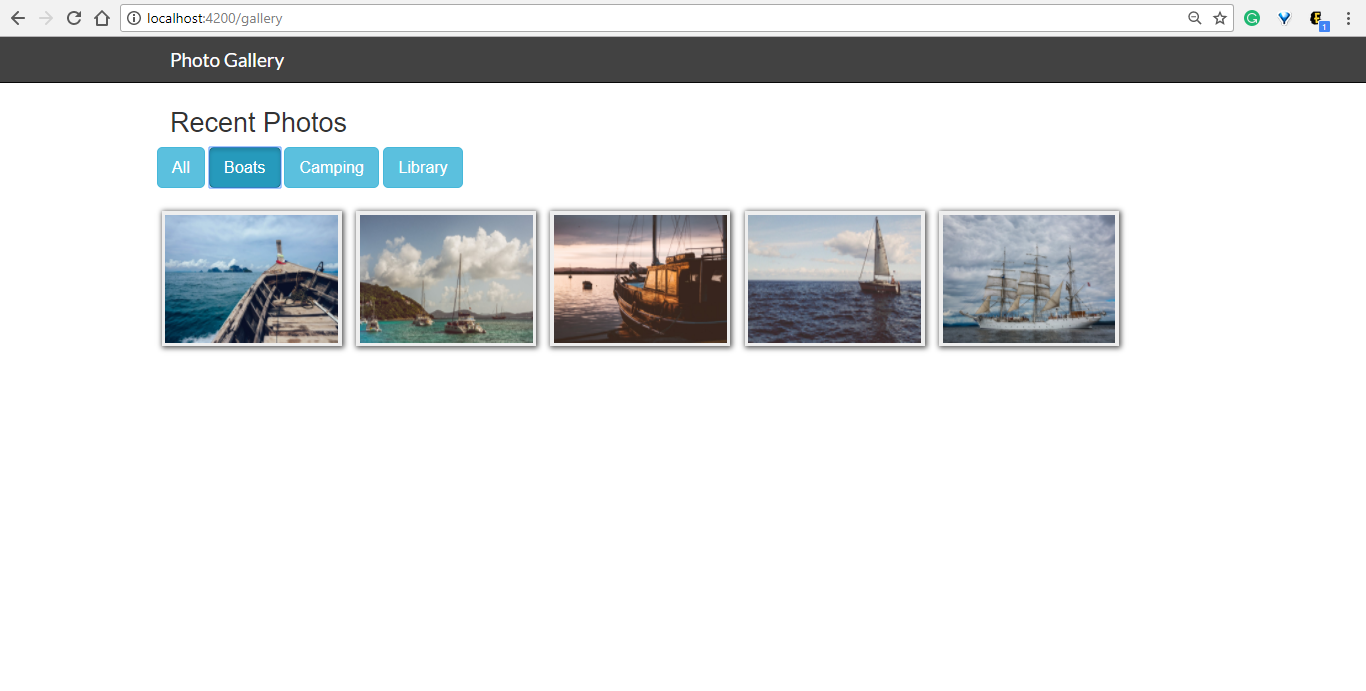
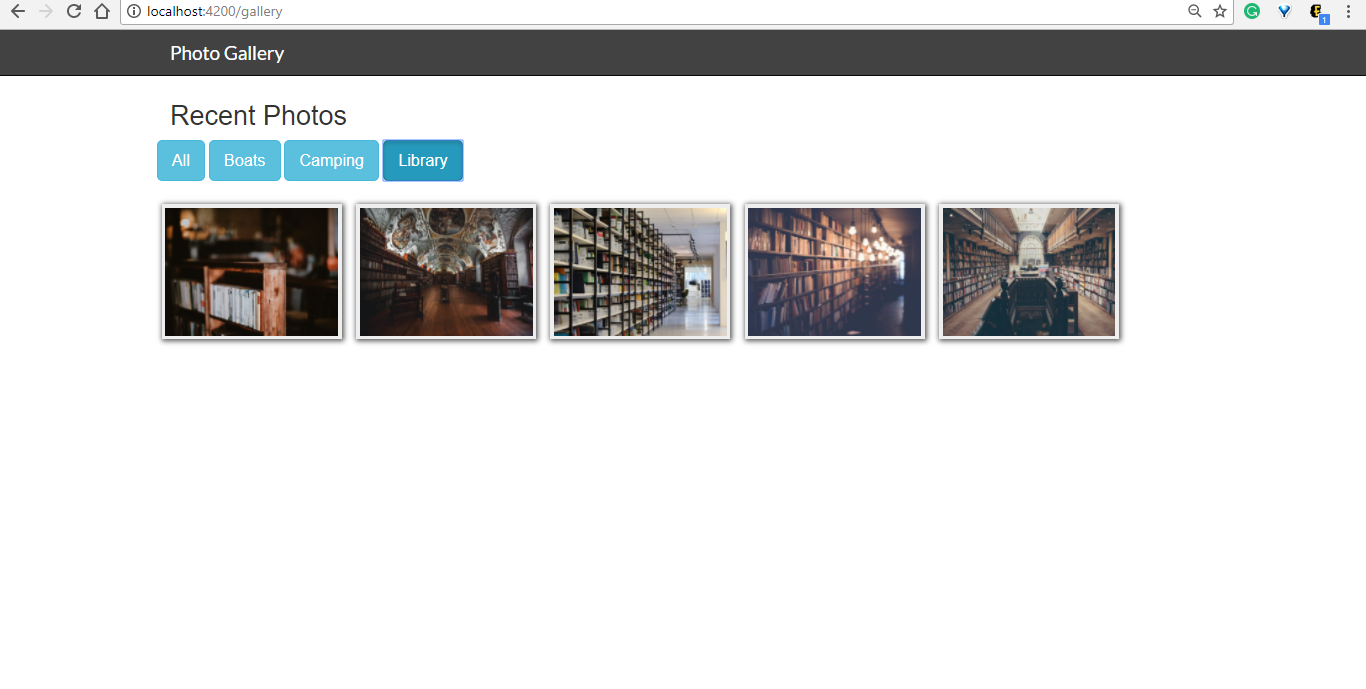
    Filtering images by category

    When clicked on an image, its details are displayed


    Generate angular application using Angular CL

    $ng new PhotoGalleryApp

    Bootstrap Installation Step

    Step 1:
    $npm install ngx-bootstrap bootstrap –save

    Step 2:
    In app.module.ts,
    import {AlertModule} from 'ngx-bootstrap/ng2-bootstrap';
    

    and import AlertModule in imports[ ] of NgModule decorator
    Include the following relative path under “styles” attribute in .angular-cli.json

    "styles": [
            "styles.css",
            "../node_modules/bootstrap/dist/css/bootstrap.min.css"
          ]
    

    While using AlertModule component form bootstrap, I encountered this issue =>
    No provider for alertconfig! – with angular-cli
    Solution: Import AlertModule with with forRoot() in imports[ ] of NgModule() decorator in app.module.ts
    @NgModule({ 
            ------
            ------
            
            imports: [
            ------
            ------
            AlertModule.forRoot()
            ],
            -------
            -------
    })
    

    Reference link: valor-software/ngx-bootstrap#1365


    Create a navbar component inside app folder

    Google fonts are used in navbar component. Search for Lato and Open-sans
    Embed the following line of code in index.html under tag
    <link href="https://fonts.googleapis.com/css?family=Lato|Open+Sans" rel="stylesheet">
    

    Create an image component that will be displayed inside the gallery

    Use service Service will be dealing with fetching the image from backend service. Serve static images Service will be injected in ImageDetailComponent’s constructor


    Add ImageService to the list of providers in app.module.ts
    Use pipes to filter images

    Image detail component will allow us to see an instance of an image. For this, routes are implemented. This will allow to change view in the application. Register the routes in app.module.ts

    import { appRoutes } from '../routes';
    
    @NgModule({
            -------
            -------
            ------
            imports: [ 
            ------
            -----
            RouterModule.forRoot(appRoutes)
            -----
    ]
    

    Include following in app.component.html

    <router-outlet></router-outlet> 
    

    router-outlet => Acts as a placeholder that Angular dynamically fills based on the current router state


    I encountered the error such not a module in the console when I tried adding the components manually.
    Solution: Try restartring the editor. Complie and run the code again. This happens when you add a new class outside from your editor or keep running your angular cli ‘ng serve’. Actually your editor or ‘ng serve’ not able to find the newly created files.
    Reference link: https://stackoverflow.com/questions/34629517/file-app-hero-ts-is-not-a-module-error-in-the-console-where-to-store-interfac
    Visit original content creator repository https://github.com/patilankita79/Angular4-PhotoGallery
  • Frontend Mentor – Single Price Grid Component

    Frontend Mentor – Single Price Grid Component

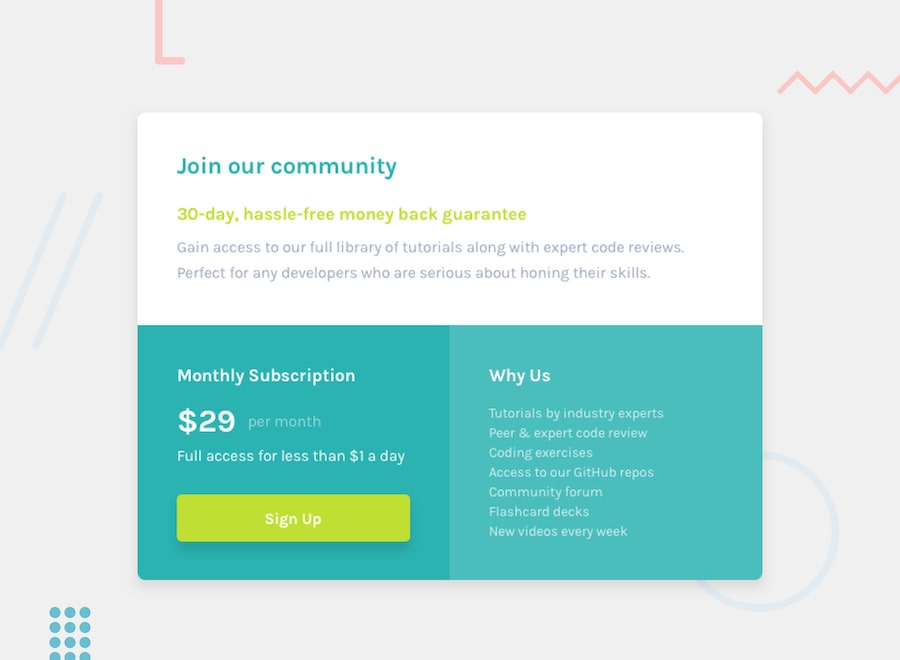
    Design preview for the Single Price Grid Component coding challenge

    Welcome! 👋

    Thanks for checking out this front-end coding challenge.

    Frontend Mentor challenges allow you to improve your skills in a real-life workflow.

    To do this challenge, you need a basic understanding of HTML and CSS.

    The challenge

    Your users should be able to:

    • View the optimal layout for the component depending on their device’s screen size
    • See a hover state on desktop for the Sign Up call-to-action

    Want some support on the challenge? Join our Slack community and ask questions in the #help channel.

    Where to find everything

    Your task is to build out the project to the designs inside the /design folder. You will find both a mobile and a desktop version of the design to work to.

    The designs are in JPG static format. This will mean that you’ll need to use your best judgment for styles such as font-size, padding and margin. This should help train your eye to perceive differences in spacings and sizes.

    If you would like the Sketch file in order to inspect the design in more detail you can subscribe as a PRO member.

    You will find all the required assets in the /images folder. The assets are already optimized.

    There is also a style-guide.md file, which contains the information you’ll need, such as color palette and fonts.

    Building your project

    Feel free to use any workflow that you feel comfortable with. Below is a suggested process, but do not feel like you need to follow these steps:

    1. Initialize your project as a public repository on GitHub. This will make it easier to share your code with the community if you need some help. If you’re not sure how to do this, have a read through of this Try Git resource.
    2. Configure your repository to publish your code to a URL. This will also be useful if you need some help during a challenge as you can share the URL for your project with your repo URL. There are a number of ways to do this, but we recommend using Vercel. We’ve got more information about deploying your project with Vercel below.
    3. Look through the designs to start planning out how you’ll tackle the project. This step is crucial to help you think ahead for CSS classes that you could create to make reusable styles.
    4. Before adding any styles, structure your content with HTML. Writing your HTML first can help focus your attention on creating well-structured content.
    5. Write out the base styles for your project, including general content styles, such as font-family and font-size.
    6. Start adding styles to the top of the page and work down. Only move on to the next section once you’re happy you’ve completed the area you’re working on.

    Deploying your project

    As mentioned above, there are a number of ways to host your project for free. We recommend using Vercel as it’s an amazing service and extremely simple to get set up with. If you’d like to use Vercel, here are some steps to follow to get started:

    1. Sign up to Vercel and go through the onboarding flow, ensuring your GitHub account is connected by using their Vercel for GitHub integration.
    2. Connect your project to Vercel from the “Import project” page, using the “From Git Repository” button and selecting the project you want to deploy.
    3. Once connected, every time you git push, Vercel will create a new deployment and the deployment URL will be shown on your Dashboard. You will also receive an email for each deployment with the URL.

    Sharing your solution

    There are multiple places you can share your solution:

    1. Submit it on the platform so that other users will see your solution on the site. Here’s our “Complete guide to submitting solutions” to help you do that.
    2. Share your solution page in the #finished-projects channel of the Slack community.
    3. Tweet @frontendmentor and mention @frontendmentor including the repo and live URLs in the tweet. We’d love to take a look at what you’ve built and help share it around.

    Giving feedback

    Feedback is always welcome, so if you have any to give on this challenge please email hi[at]frontendmentor[dot]io.

    This challenge is completely free. Please share it with anyone who will find it useful for practice.

    Have fun building! 🚀

    Community Sponsors

    A massive thank you to our community sponsors!

    • Zero to Mastery is an incredible learning resource for all things web development. Led by Andrei Neagoie, the courses are really high-quality content and cover a wide range of in-demand skills.
    • Diversify Tech is an amazing resource for underrepresented people in tech. The site features job listings for anyone seeking new opportunities. The resource section is also full of useful links to dive into!
    • Triplebyte is a really nice offering if you’re looking for a new role. It’s a free service that lets you take a confidential quiz. Based on your results companies will pitch you for their vacant roles!
    Visit original content creator repository https://github.com/laetitiahuriaux/single-price-grid